Sawdust & Saddles
Honey Bee Stamps


Techniques:
This card features some stamps from the On The Range red rubber stamps. I used some for my feature elements, and again on the background to create a coordinating pattern there.
Stamping the red rubber images in red only puts the focus on the detailed linework in the images.
Honey Bee Stamps Products:
On The Range 5x7 Cling Stamps
Saddle Up 6x8 Stamp Set
Saddle Up Honey Cuts
Opulent Layering Frames
Techniques:
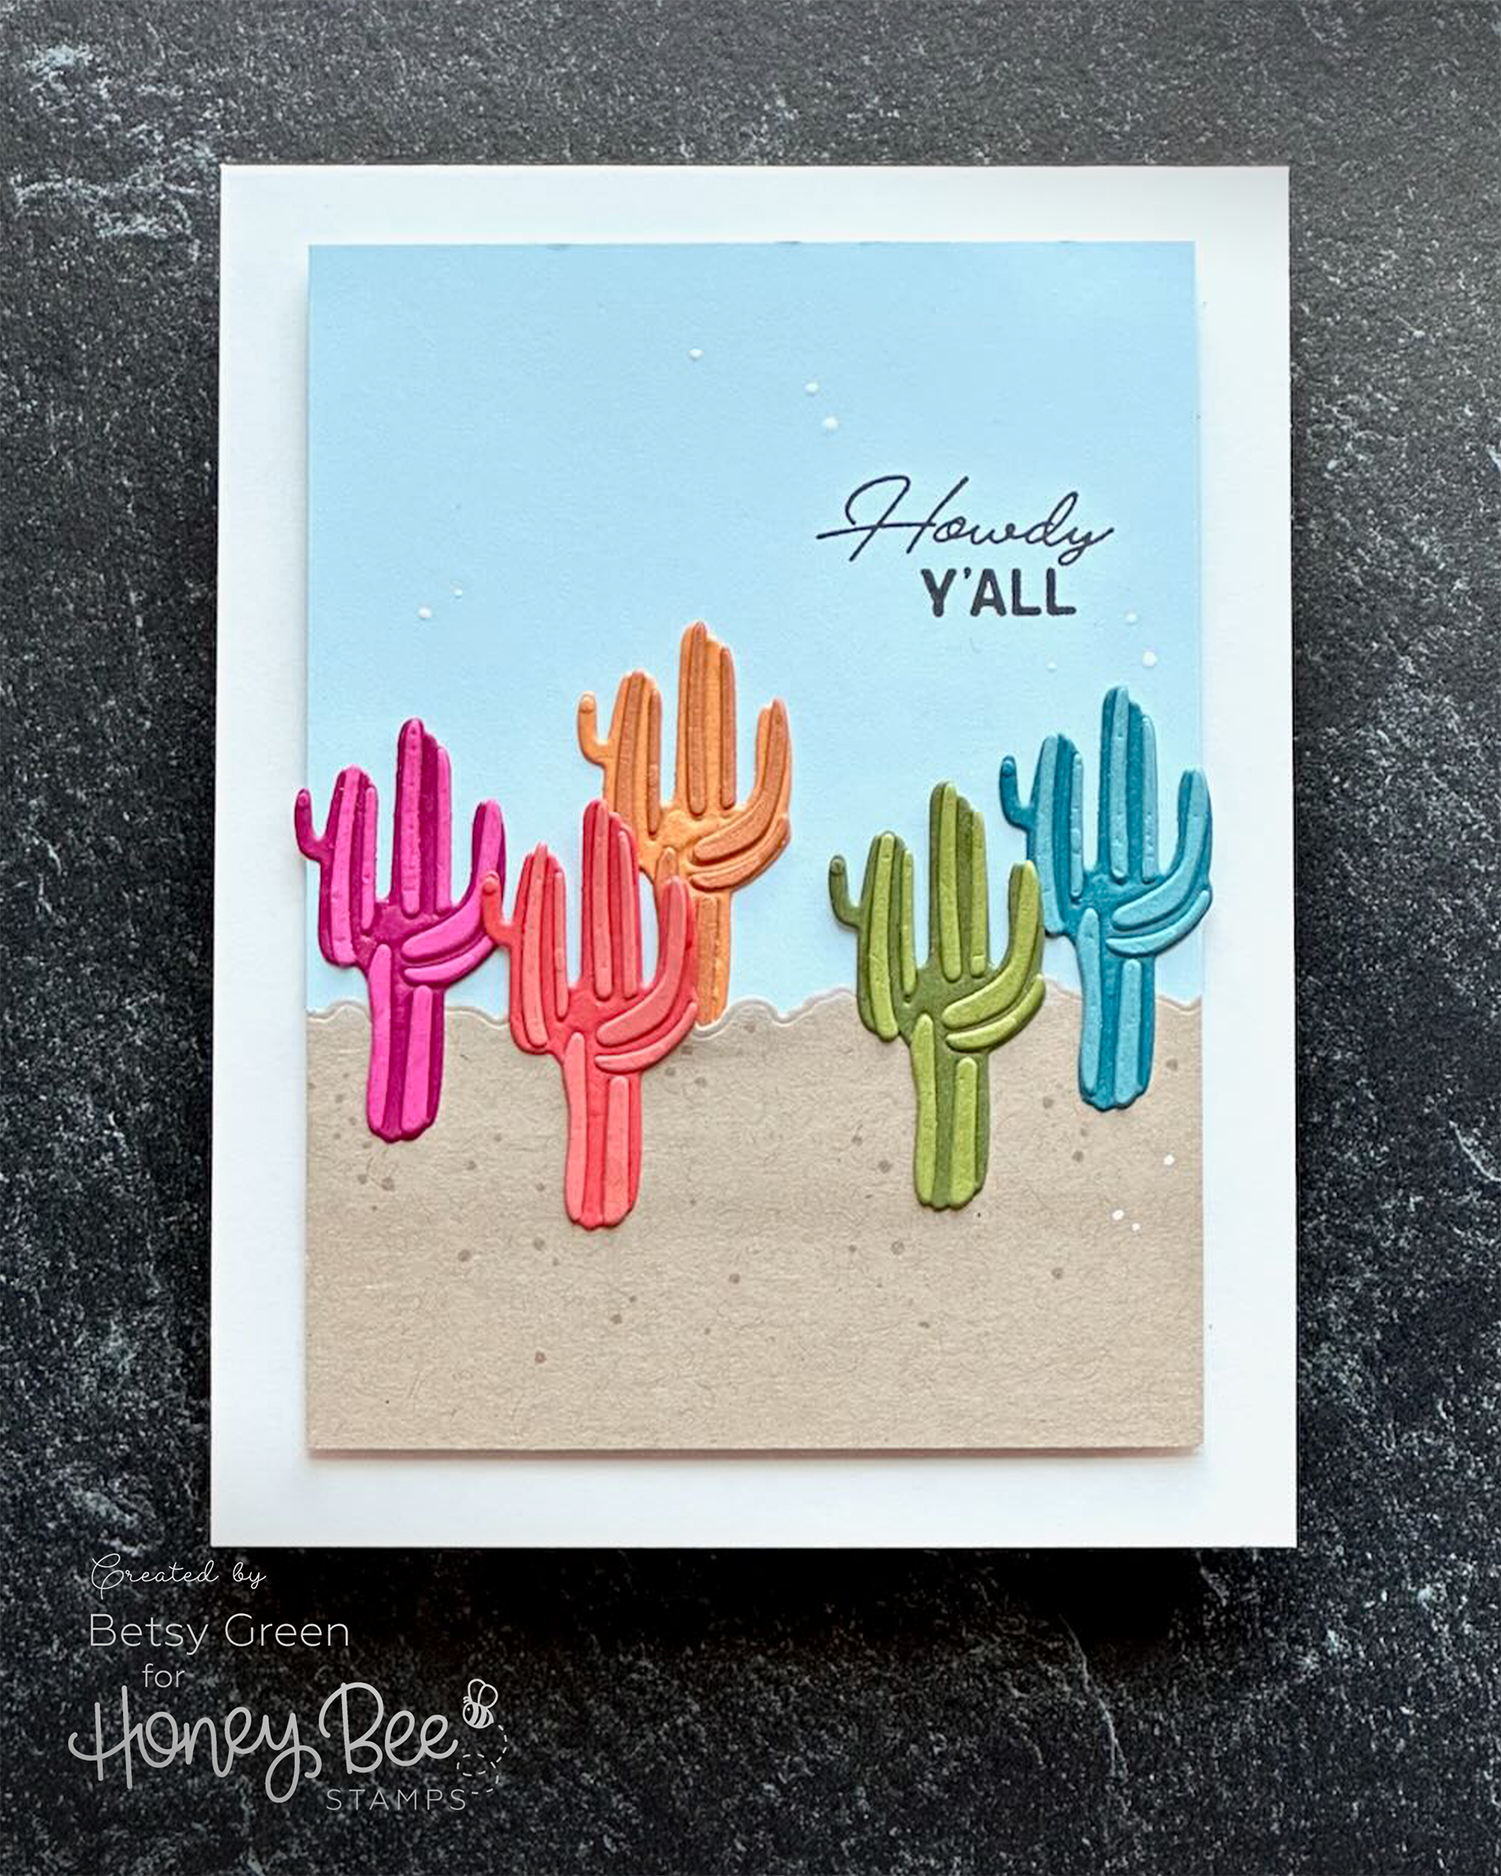
Sometimes simple is just right, and this card also uses two dies from sets in a way that isn’t what they were designed for. Things like that give us so much more value from our products, and are great creative challenges.
The cute rainbow of cactus are from the Lovely Layers Fireplace Lodge Add-On. I don’t have the fireplace these dies were created to coordinate with, but I still have lots of great uses for them, such as this example.
I wanted a rough western desert-like edge, but my edge dies are all waves or geometric. For the edge of the Wheat cardstock at the horizon here, I used the large cover outline die from the Always and Forever die set. I think it works perfectly!
Products:
Lovely Layers Fireplace Lodge Add-On
Always and Forever die set


Techniques:
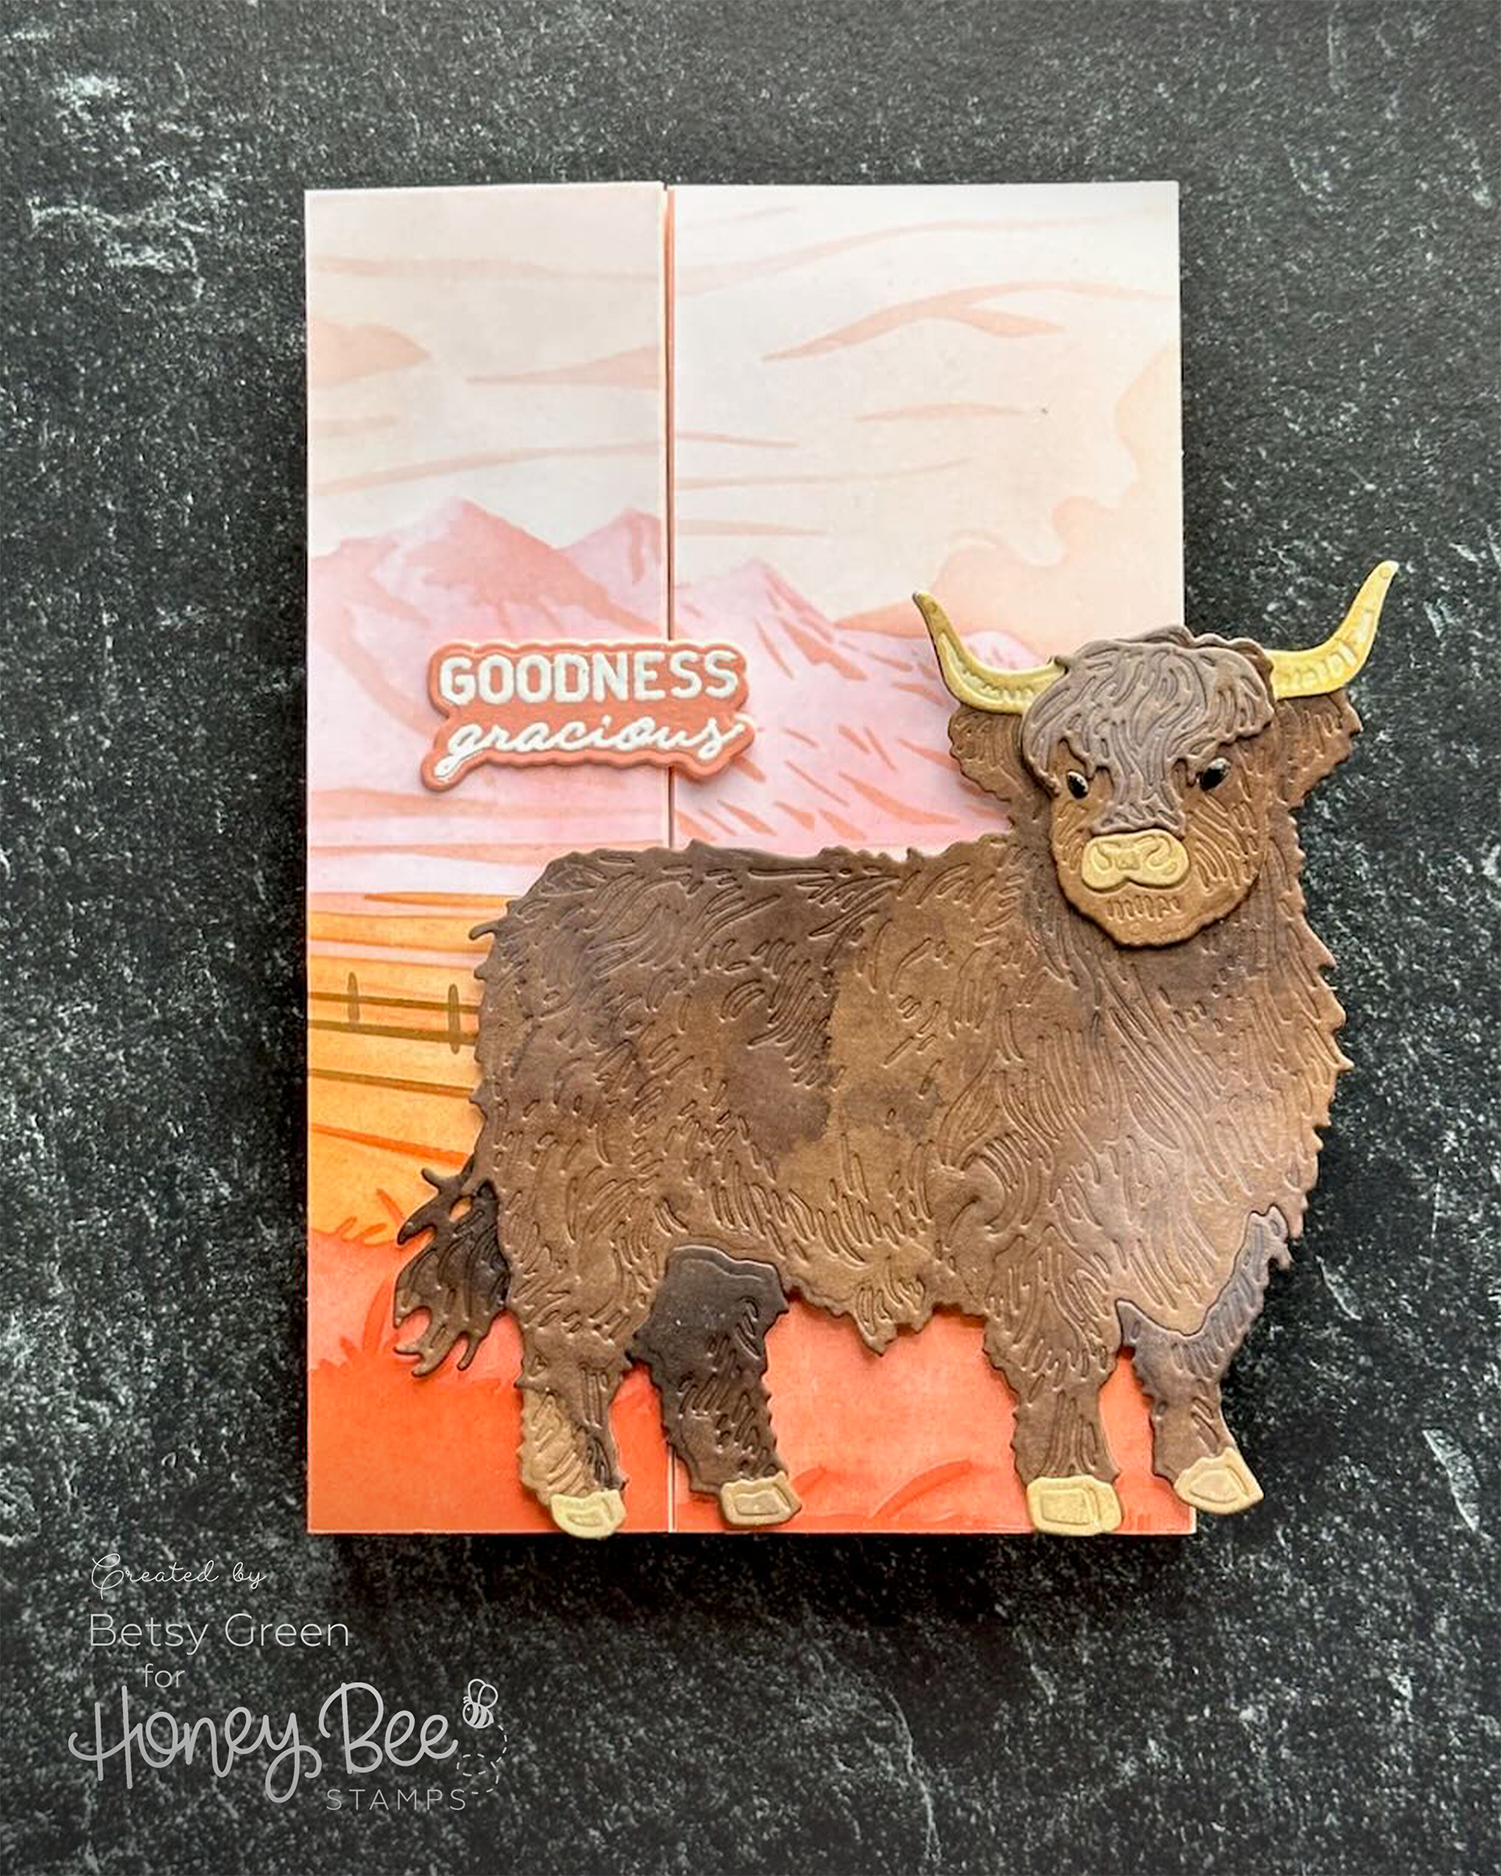
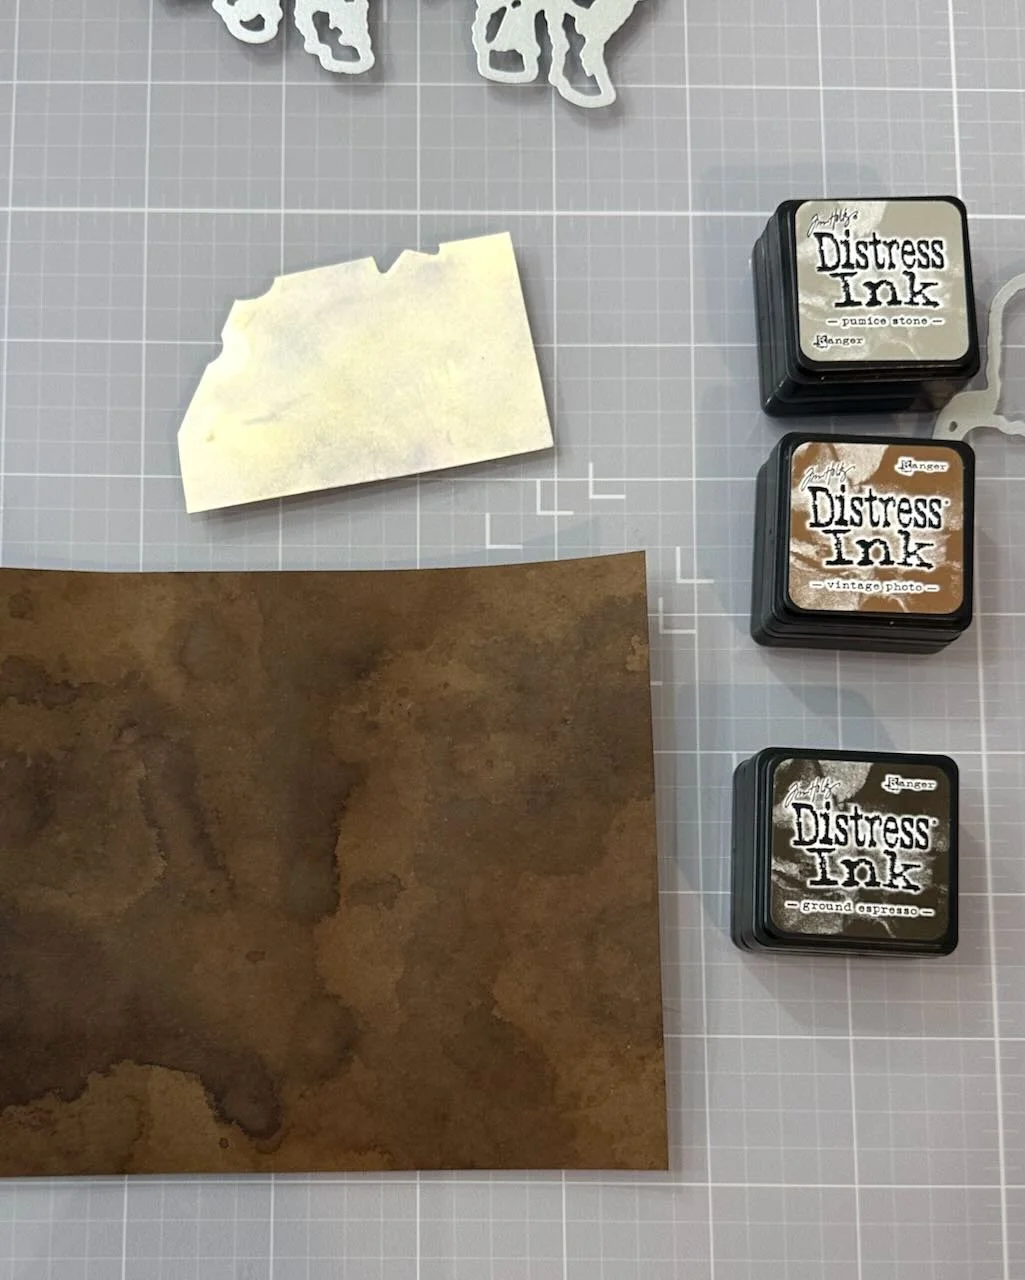
Ink smooshing on colored cardstock created a patterned paper I thought would be great for the Highland Cow fur and horns.
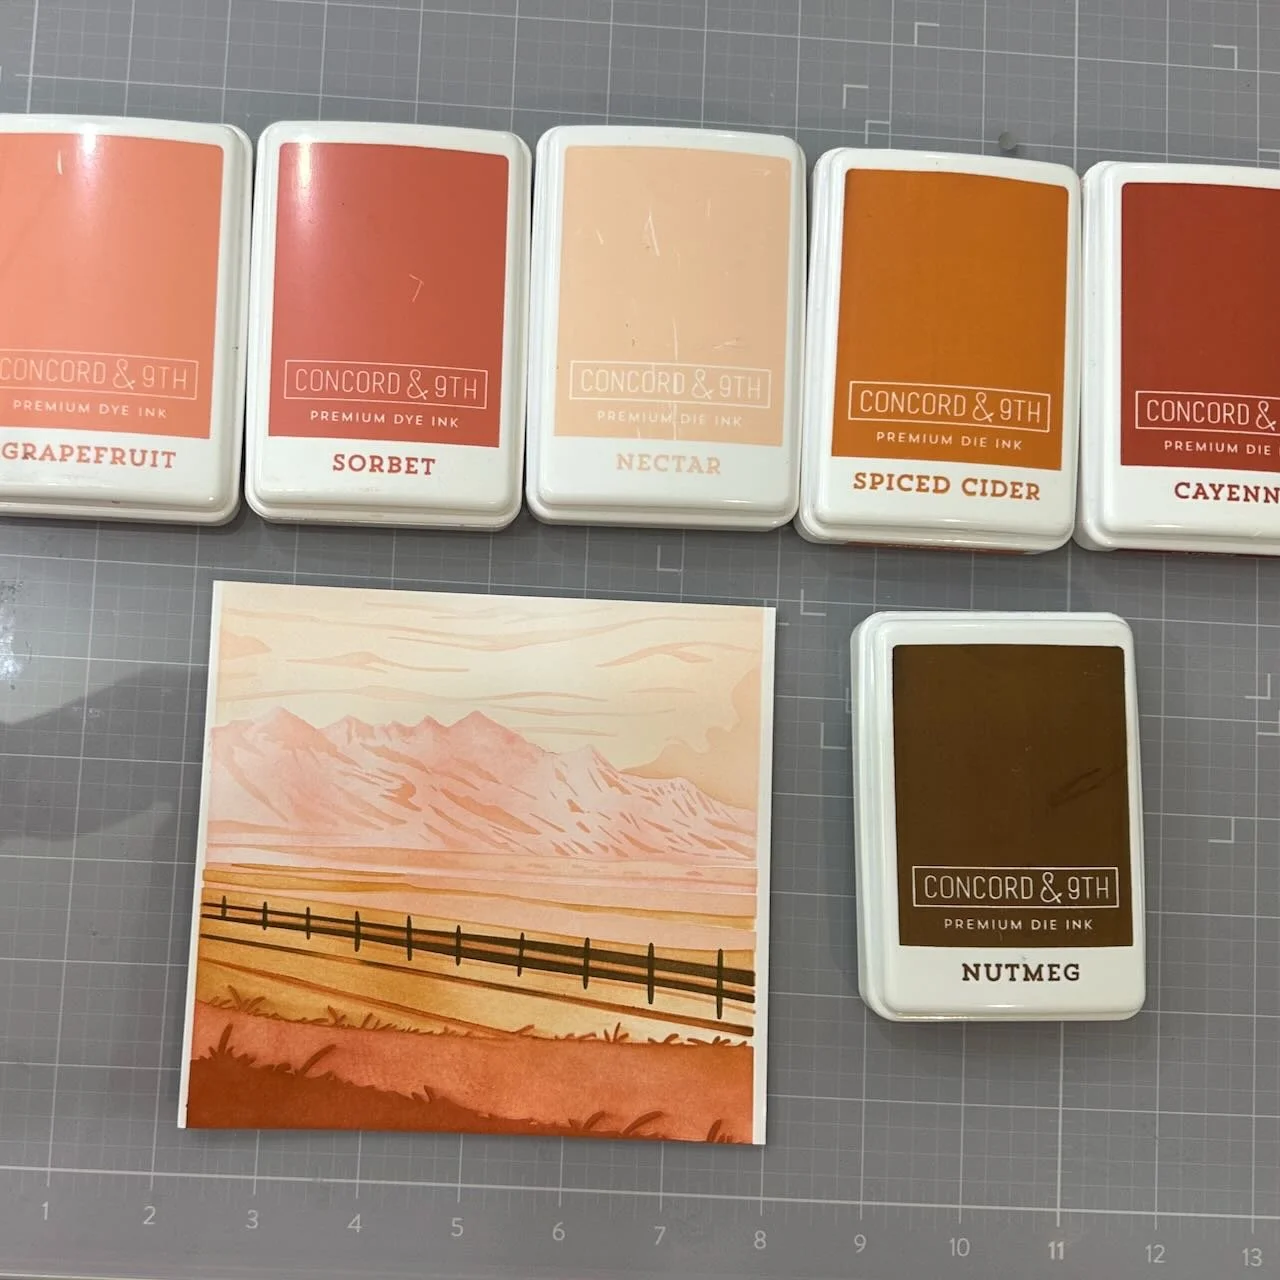
A soft warm color palette for the stenciled background coordinates well with the rich brown of the cow, and allows the cow to be the visual focal point.
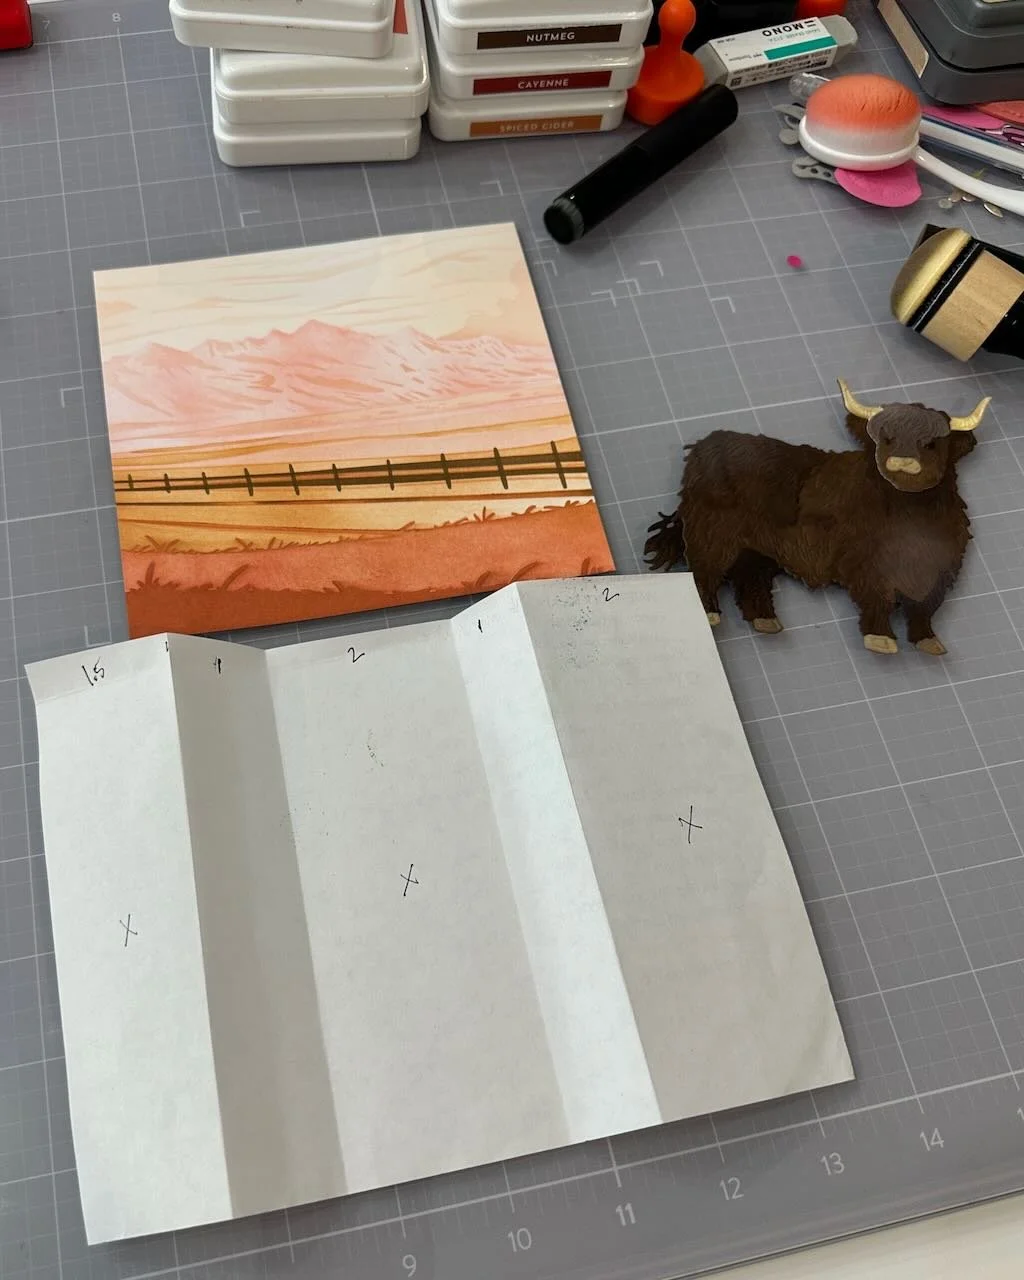
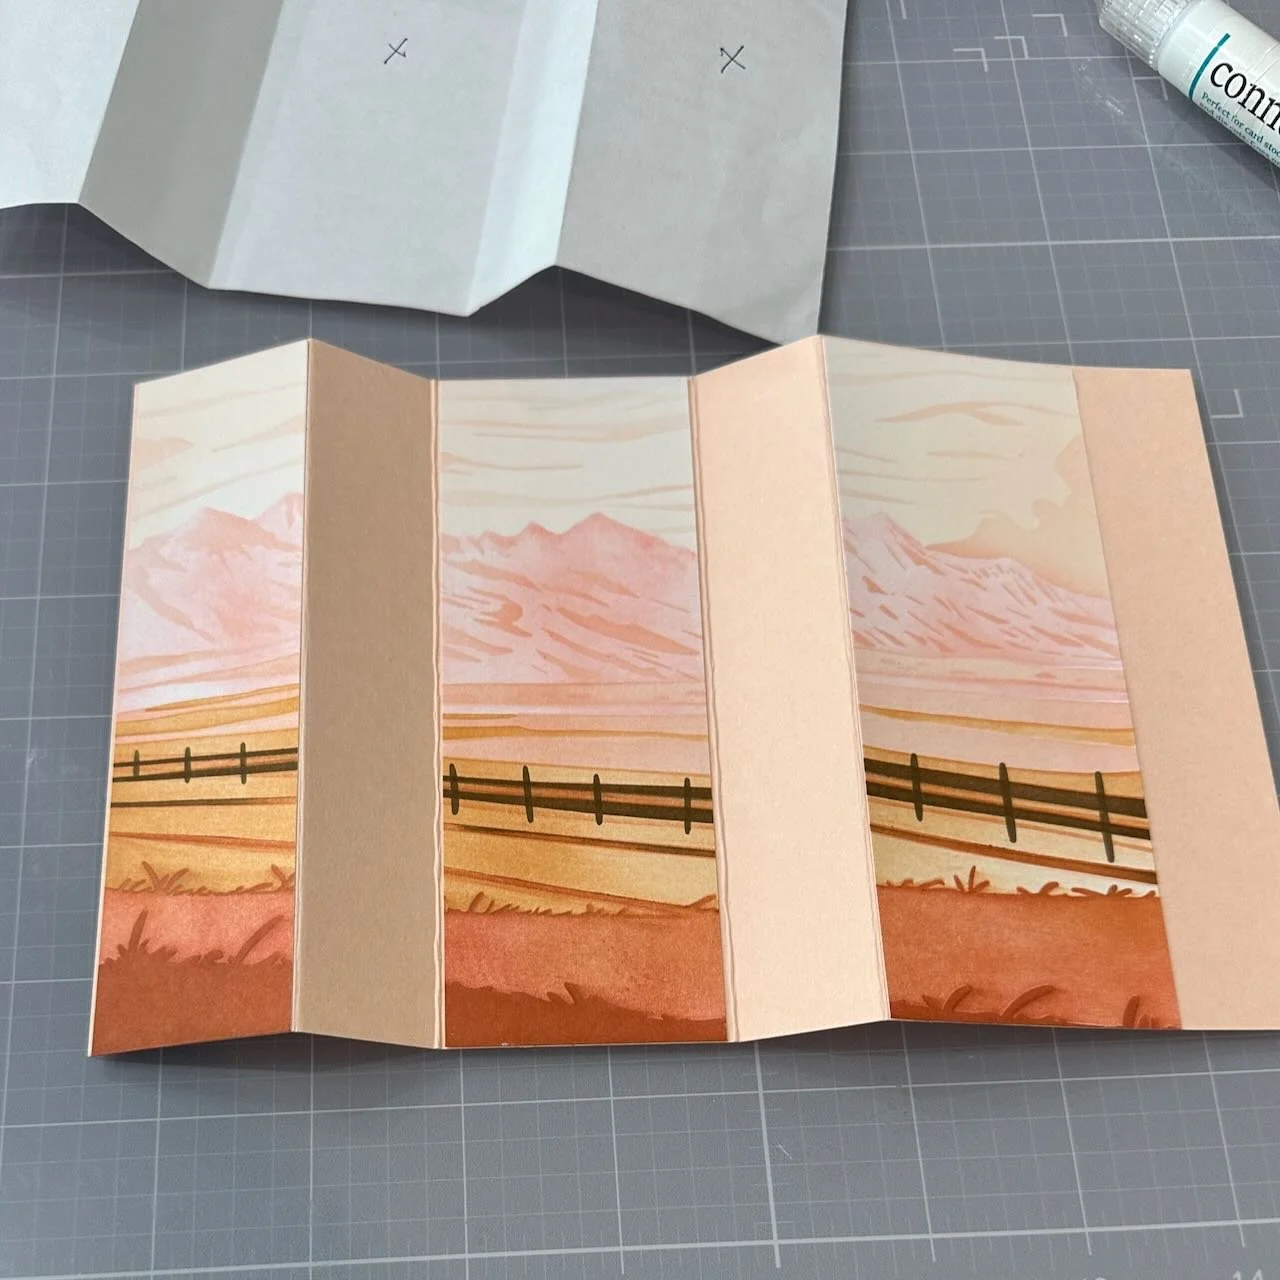
I created a folded base that would open to show more of the scene. I usually create these without a template, but often with scrap paper first to be sure the folds and dimensions work for what I need.
I used those measurements to cut and score my Nectar cardstock base, and then trimmed the background to fit the front-facing sections.
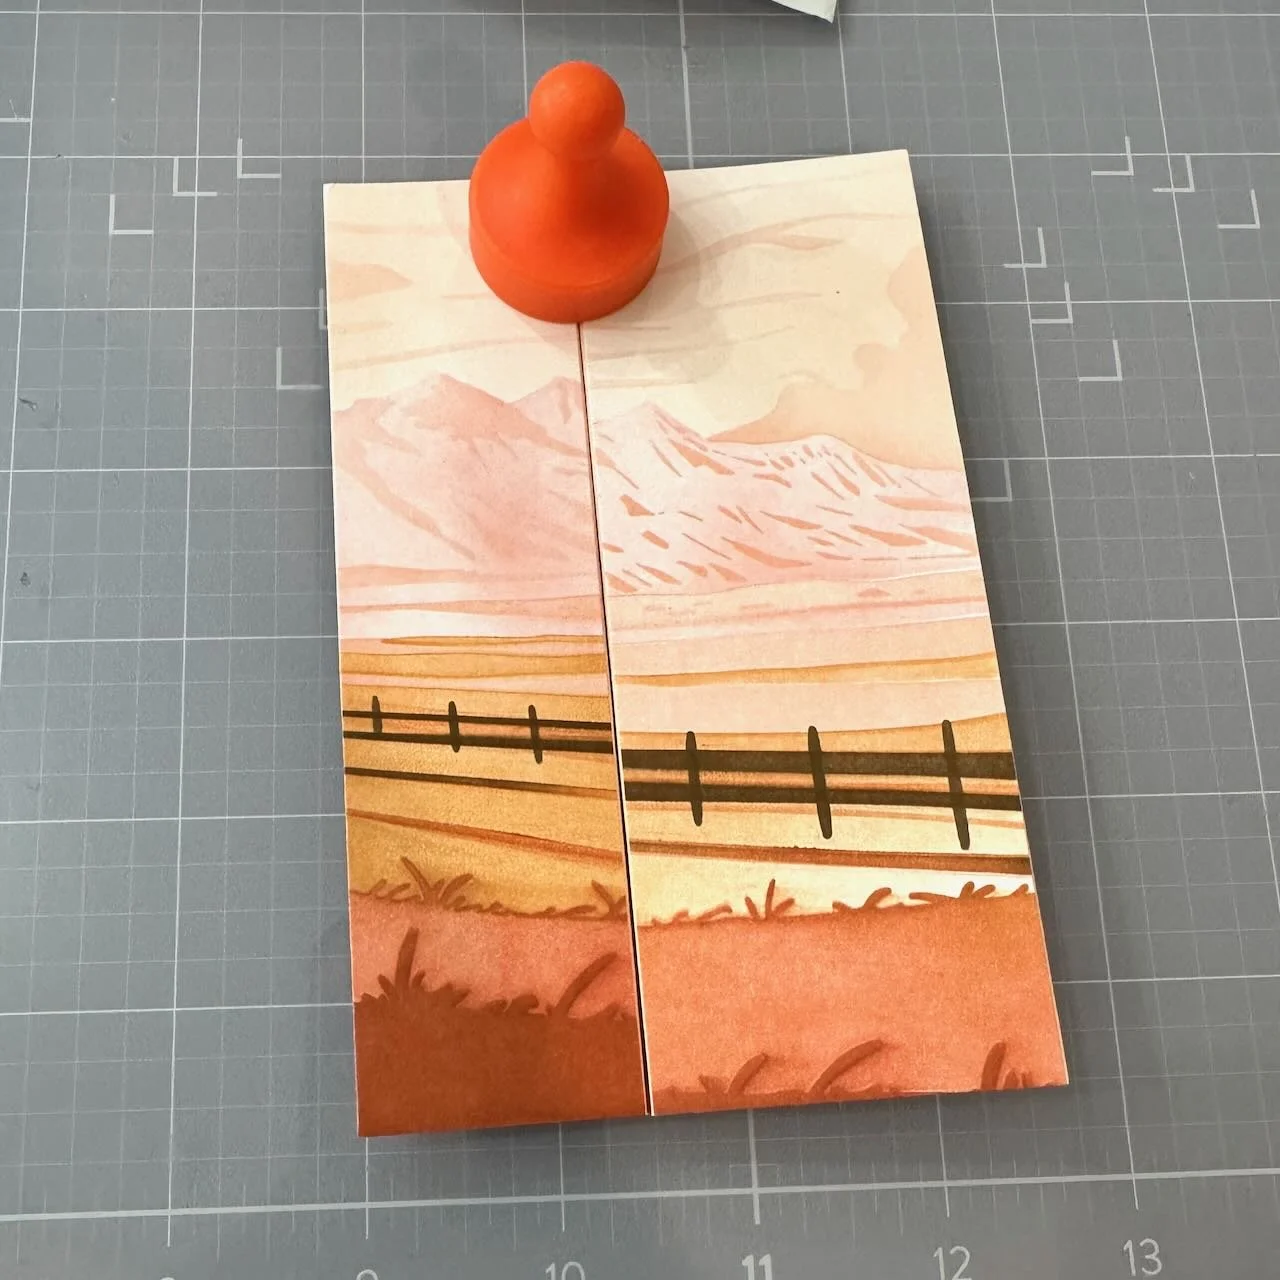
In the last picture below, you can see that the left and right sides of the background don’t line up when it is folded. No worries though - it won’t matter because the cow will be covering that up.
Products:
Lovely Layers Hooves & Horns
Range Scene Layering Stencils
Howdy Y’All Stamps and Dies


Techniques:
I chose close-to-complementary colors for the two boots, and did each boot in a mostly monochromatic way. (Aside for the bit of brown and metal.)
A bit of ink blending added a subtle touch of shadow and dimension on the colored cardstock.
Products:
Lovely Layers Western Wear
Howdy Y’All Stamps and Dies
Free Bee Patterned Paper pack

Techniques:
As I was creating the background of an evening scene, I modified my blending to leave out the fence, but I added in some blue areas for water.
For the sky detail layer, I used Royal Flush Solar Paste for a little evening shimmer, and added a bit of white splatter for stars and drew in a moon.
I wanted to feature the firepit, but also have space for a greeting within the scene, so I gave the card a short front panel, and duplicated the lower half of the background stenciling on both layers of the card panel. The flap with the firepit opens, and I had space to write a message inside that front flap.
Honey Bee Stamps Products:
Lovely Layers: Firepit Honey Cuts
Range Scene Layering Stencils
Saddle Up 6x8 Stamp Set
All Things New 6x8 Stamp Set


Thank you for visiting!
Links are below if you’re interested in any of the products I used.
*Affiliate links do not cost you any more when you shop, but it is beneficial to creators when you use them, so thanks in advance!