Going Dimensional with Dies
March Release from Concord & 9th
There’s a new release out now from Concord & 9th !
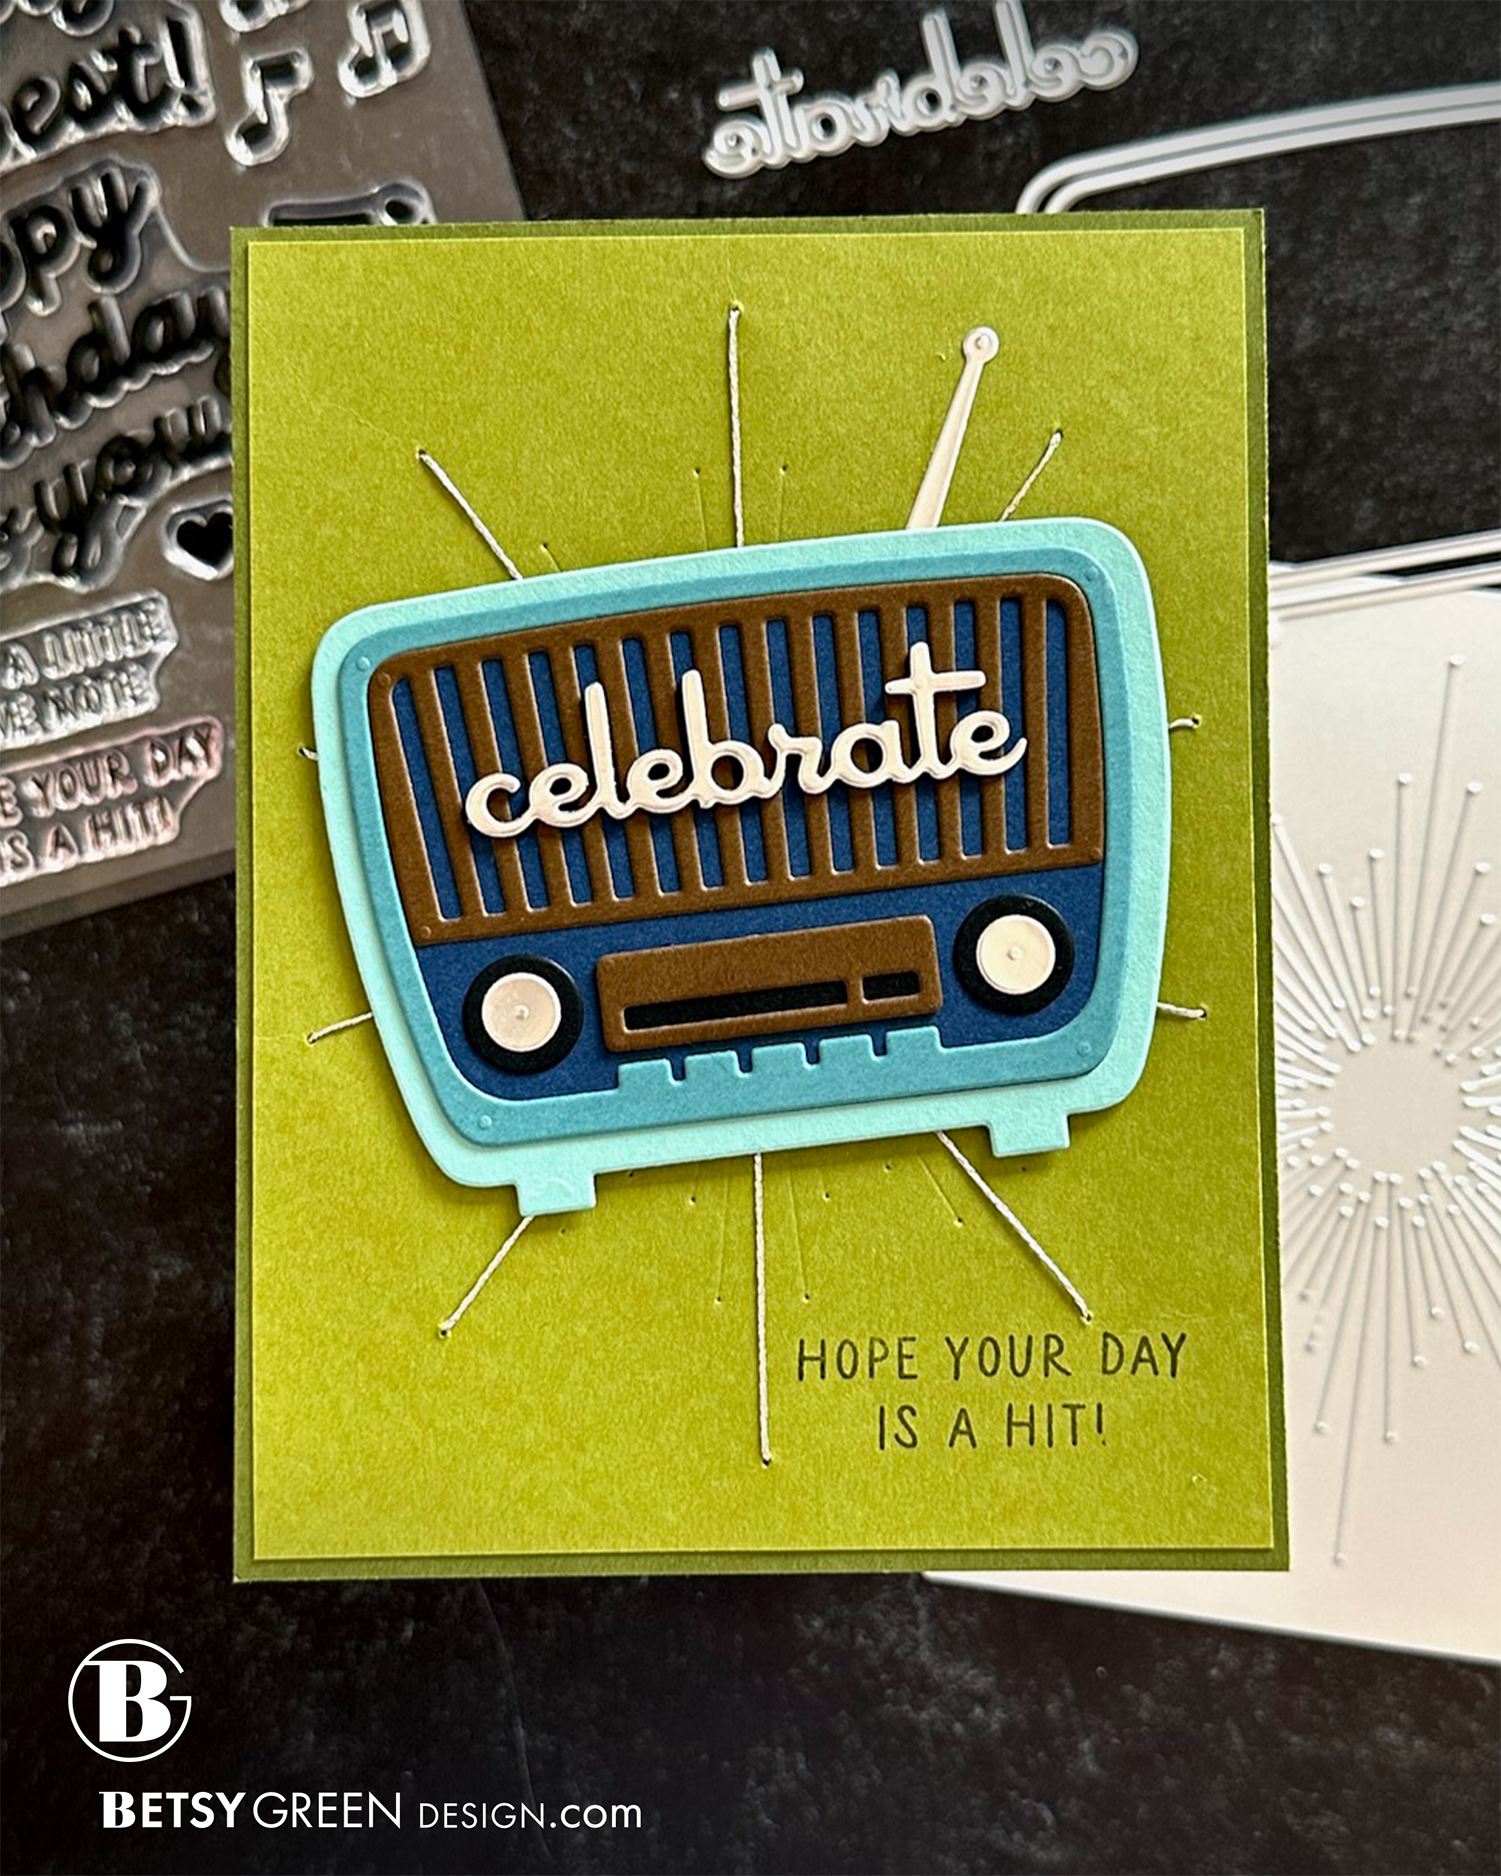
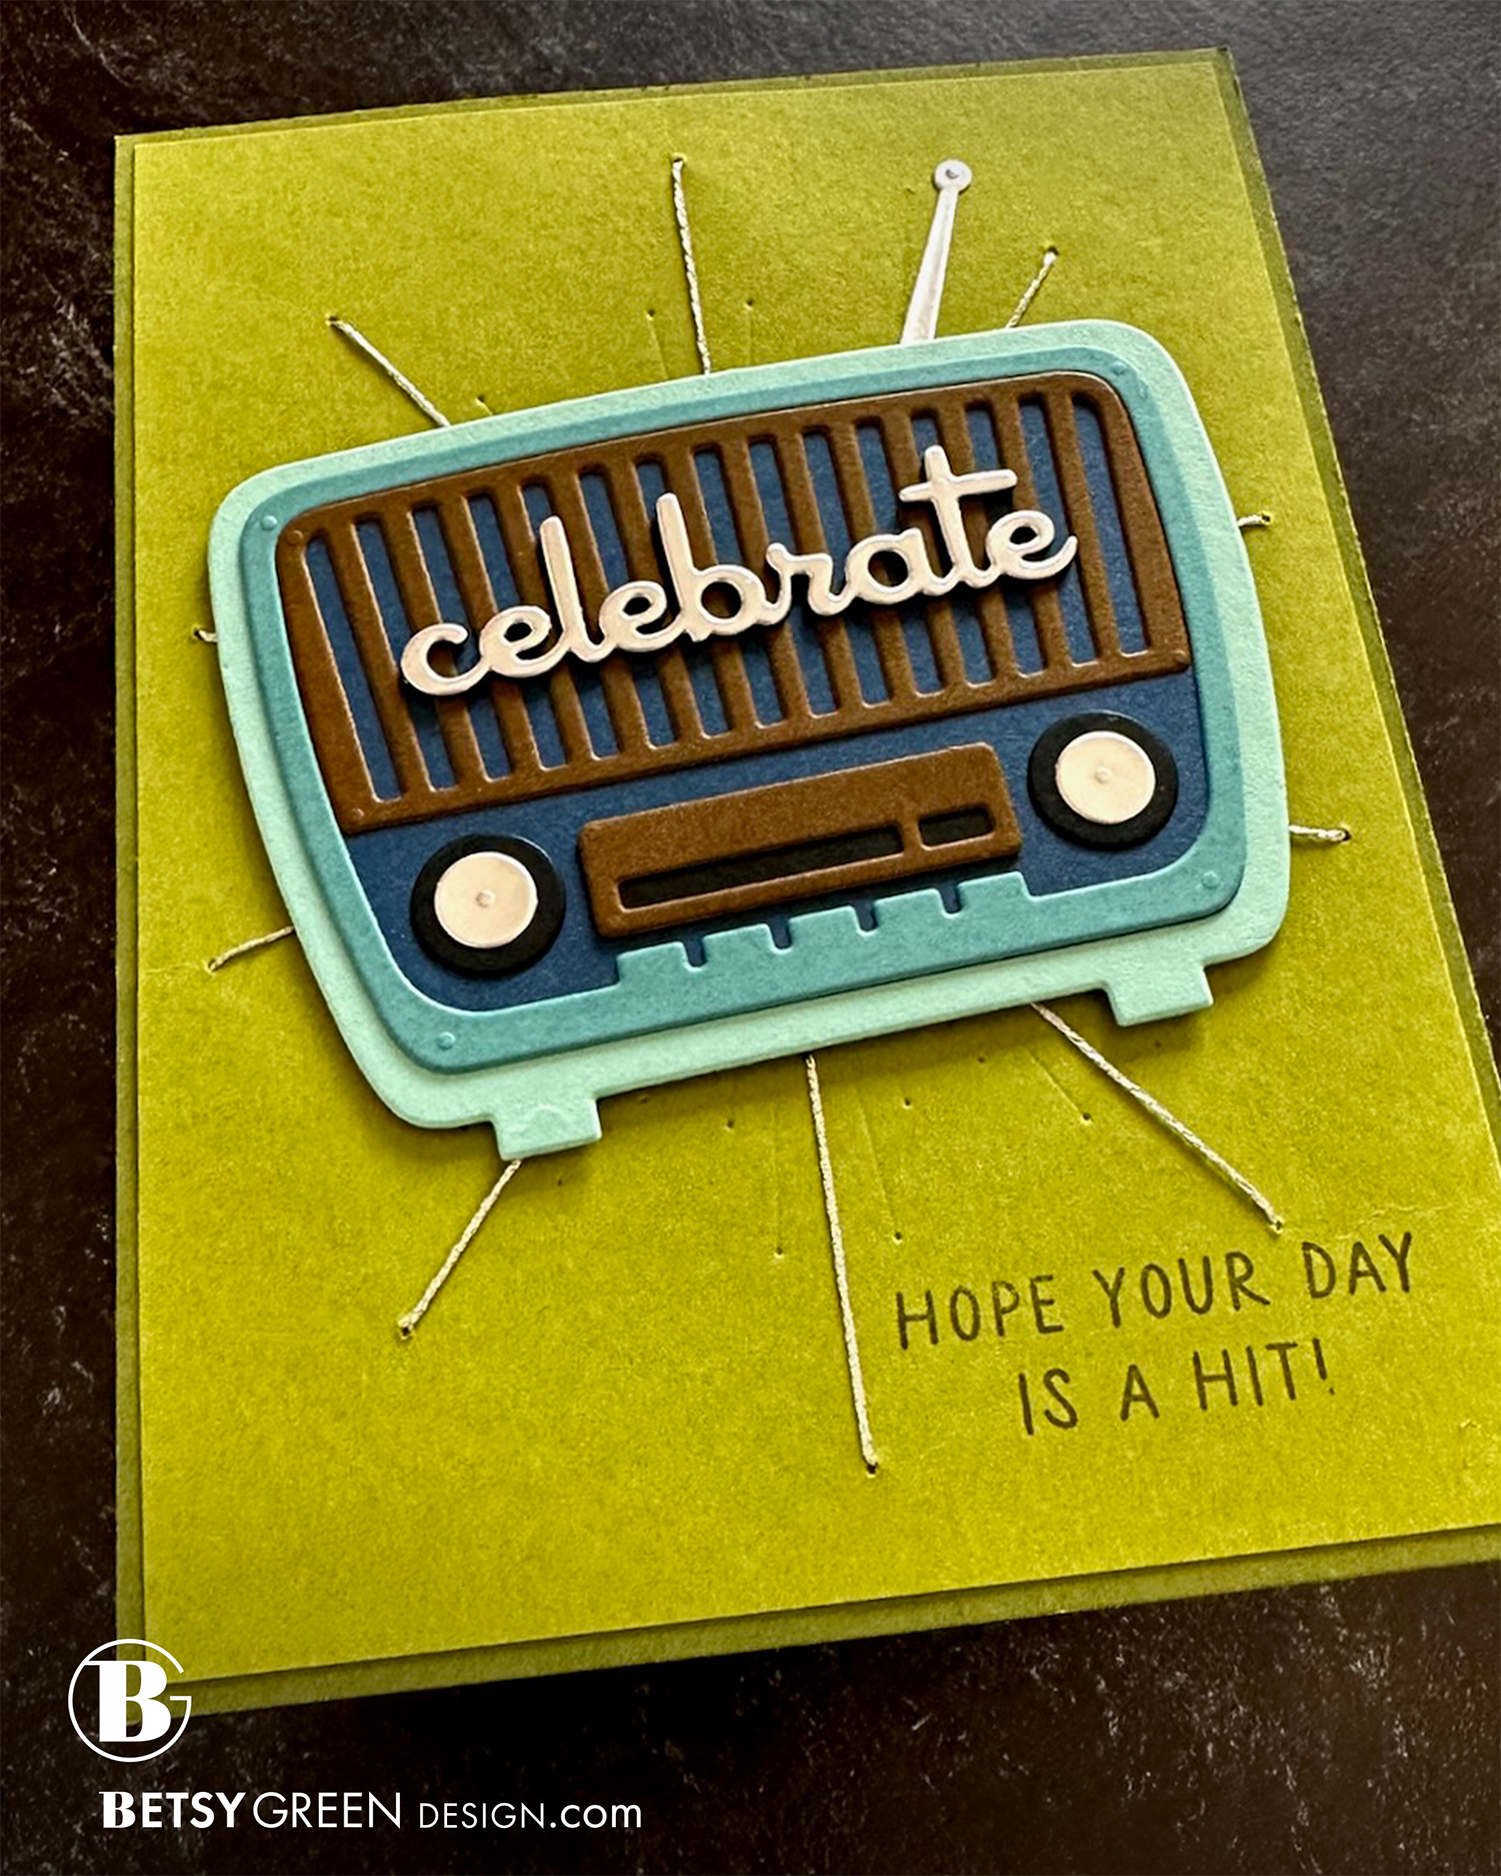
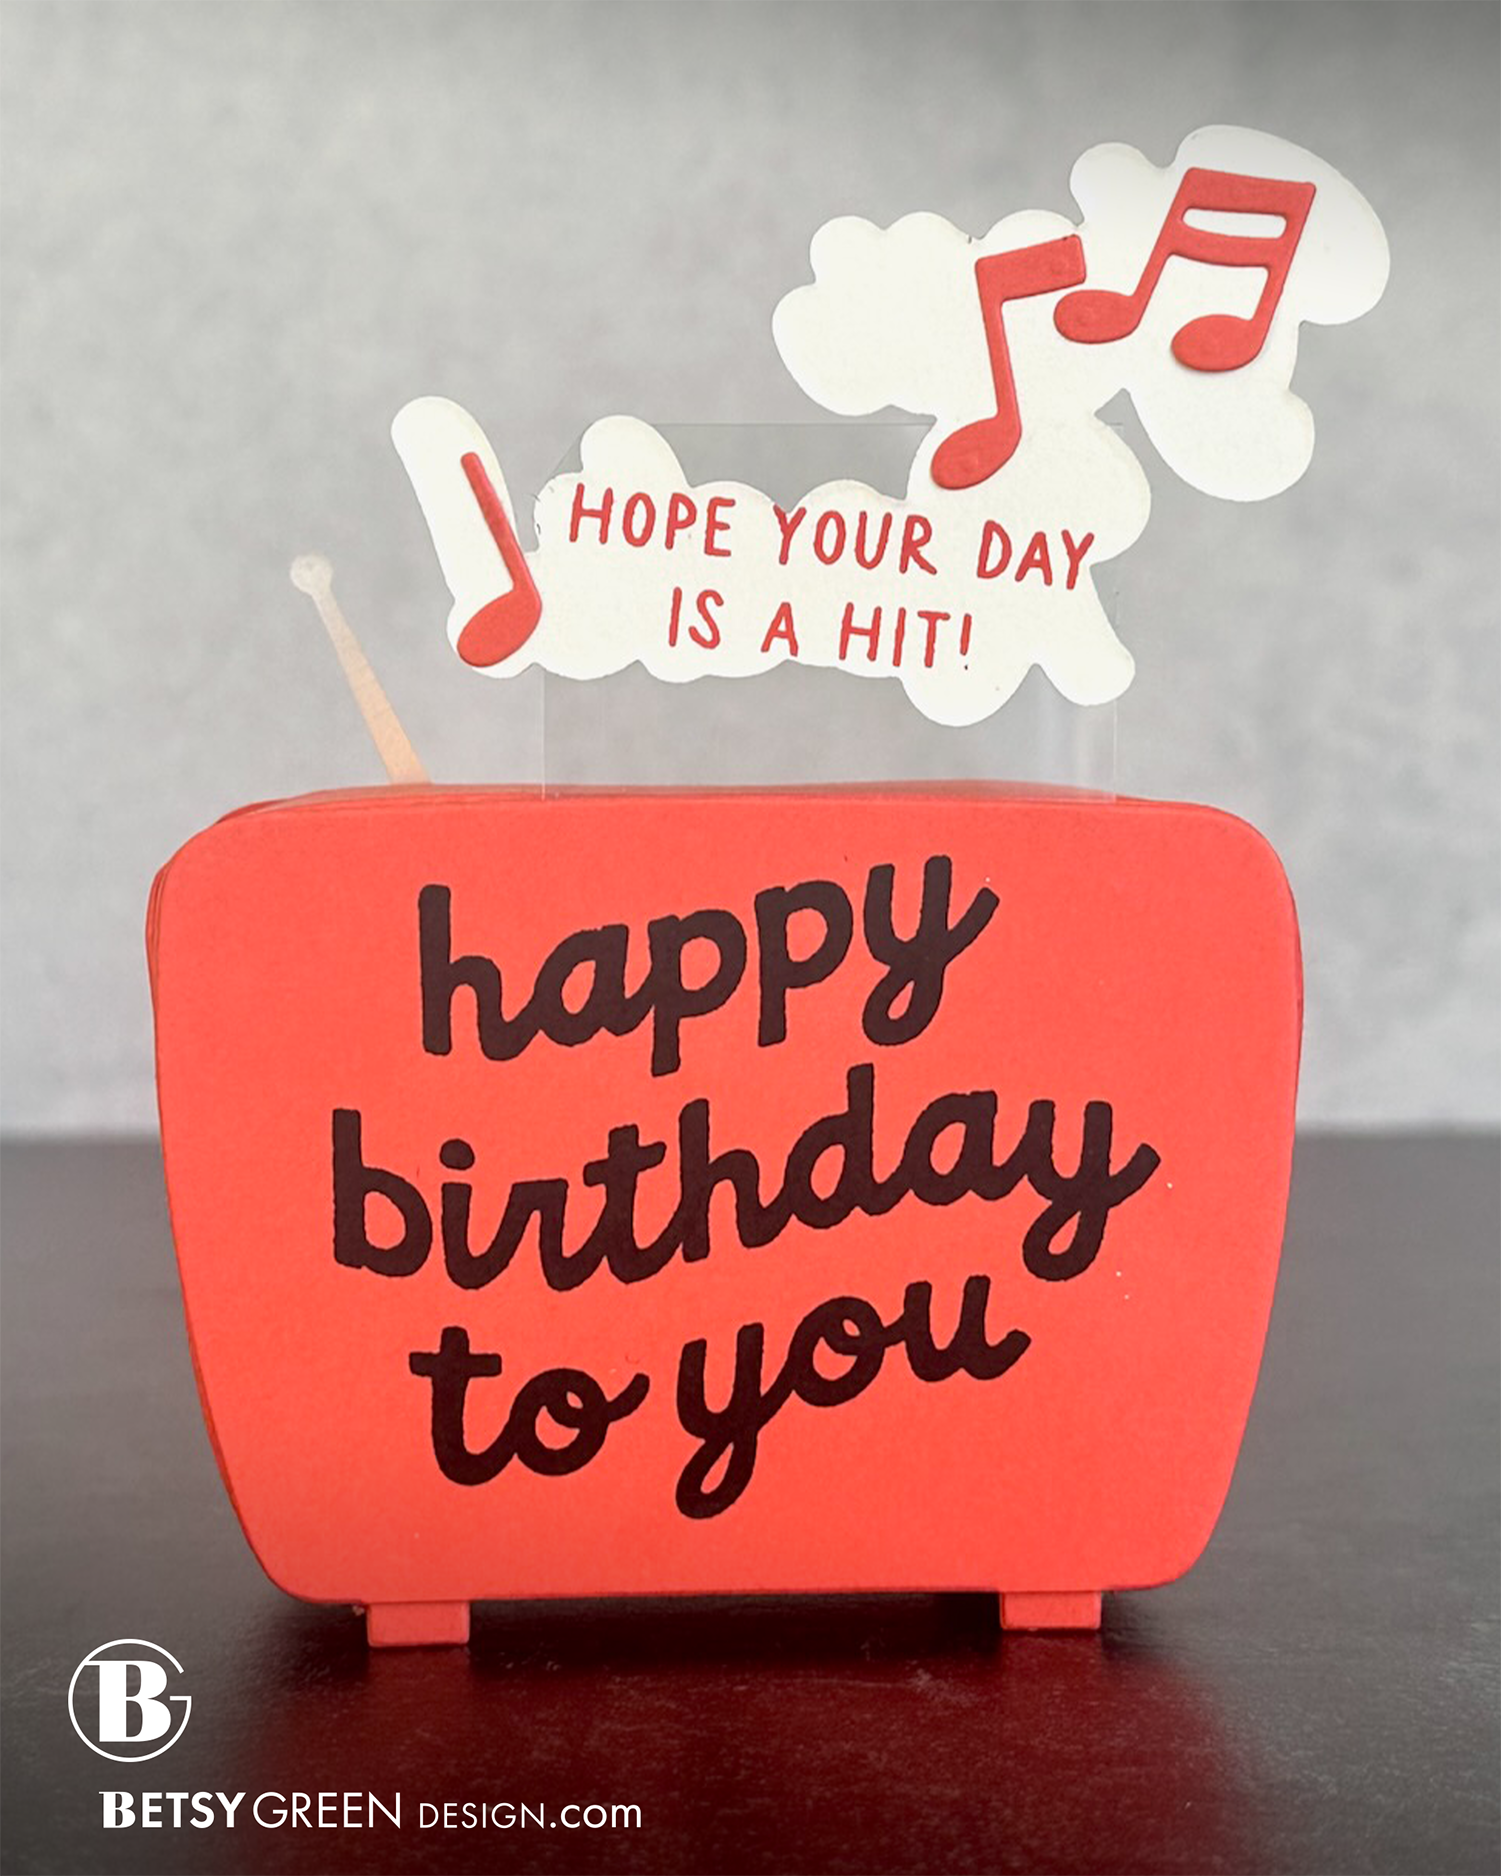
It has so many fun designs, but I wanted to share this with the Retro Radio first.
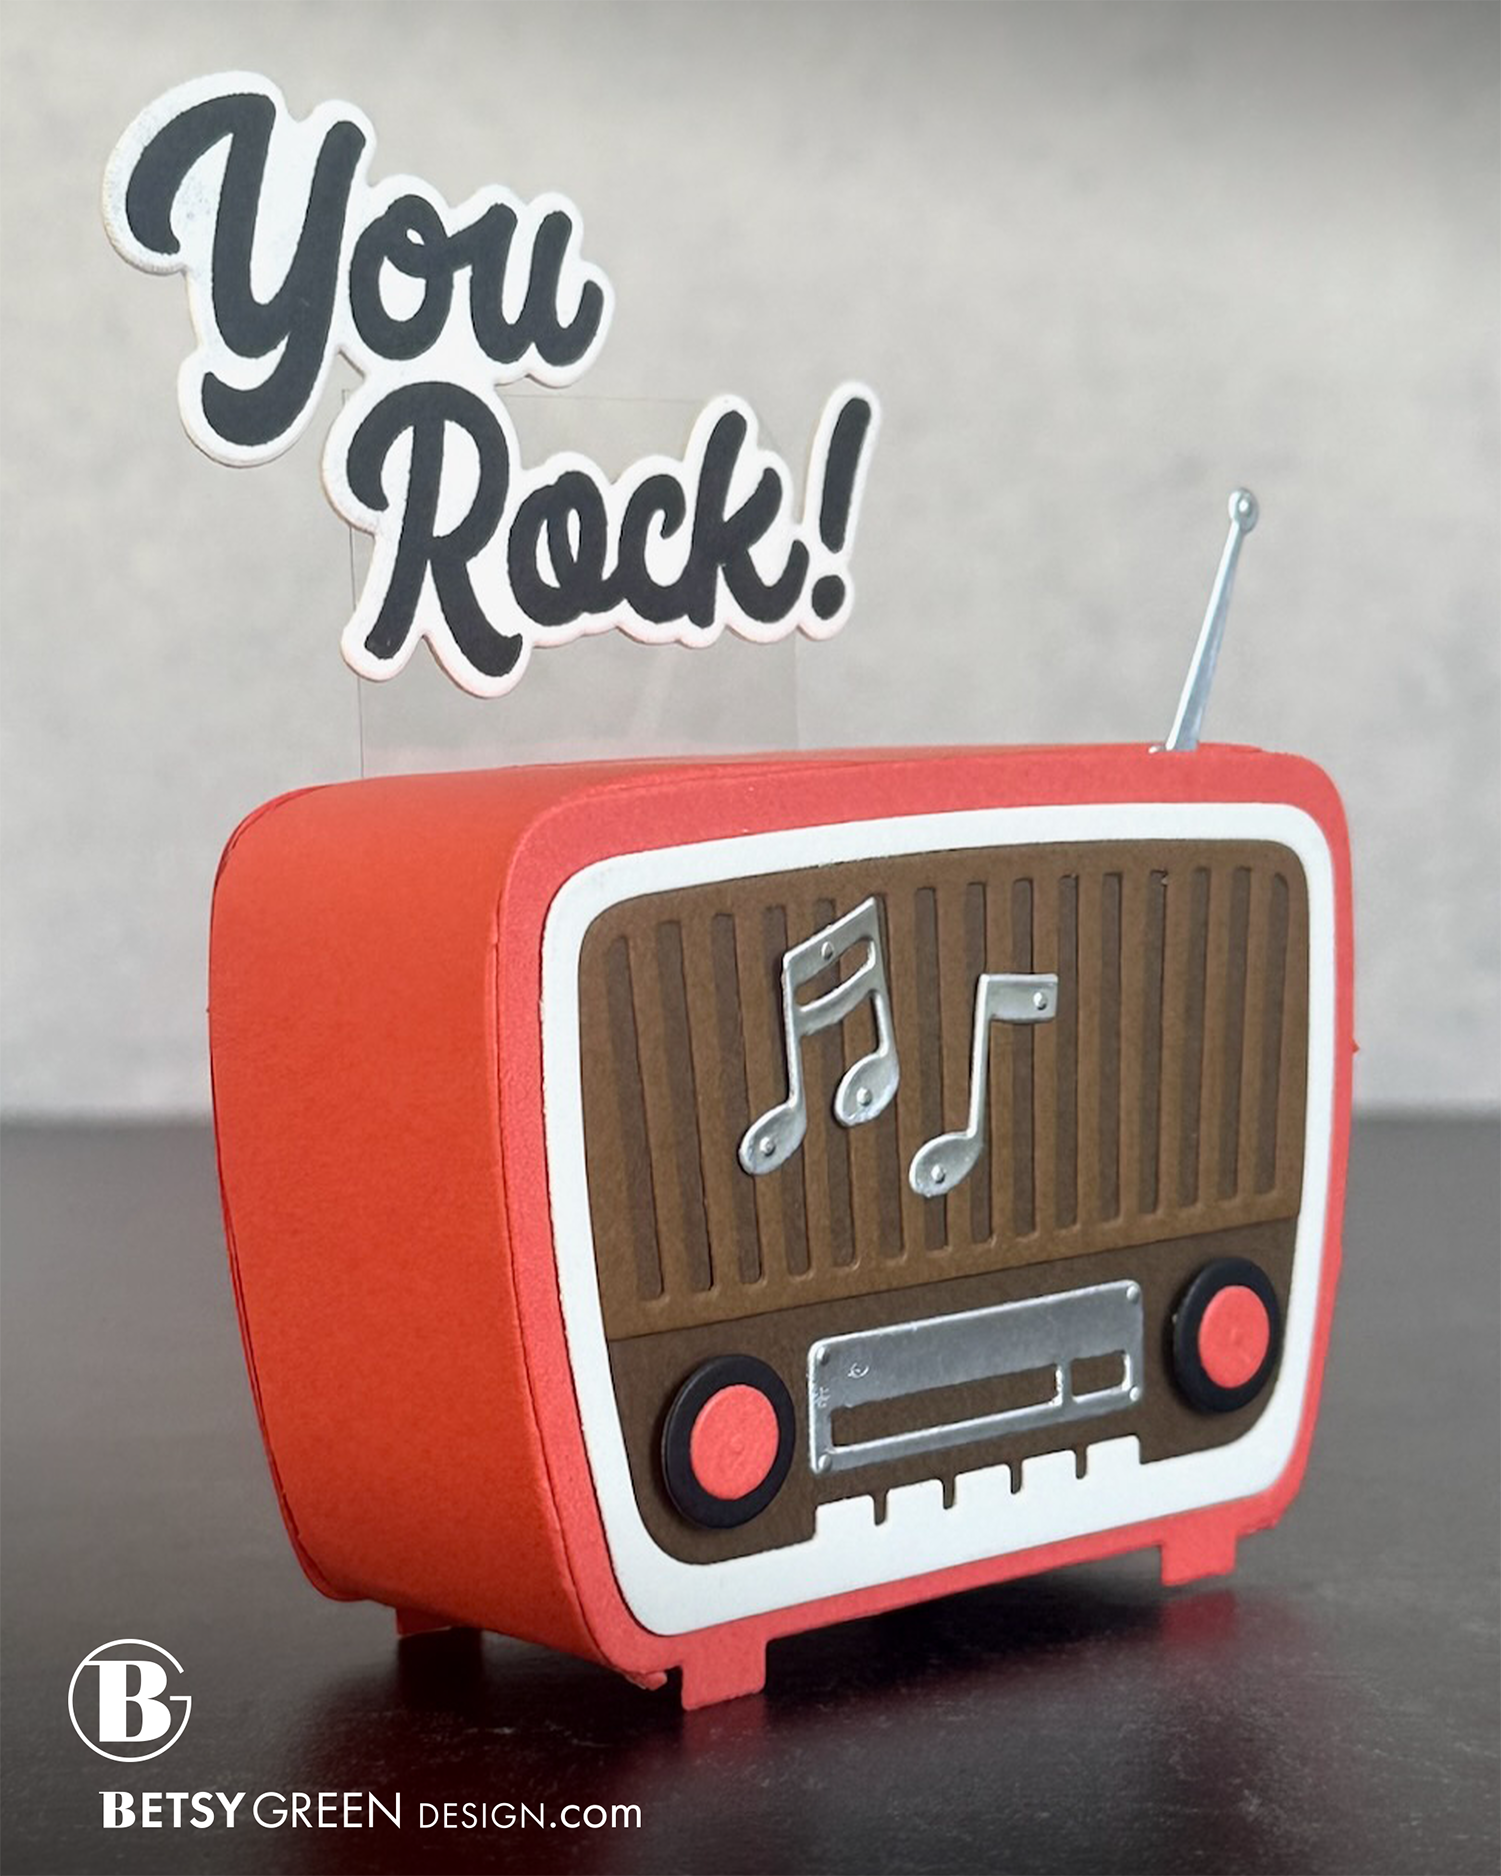
In addition to the more obvious use of the layered dies like you see in card one, I was also going to make one a pop-up, but then decided to go all in and make it 3D. Why not? (Of course, this would have to be hand delivered or mailed in a small box, but will definitely be a hit with whoever gets it, I’m sure.)


Techniques:
Layered cardstock die cuts really make me happy. I love the layers of color, and the depth it creates. The different pieces on this are easy to cut and assemble, and create such a great effect.
I added to the dimensional effect by attaching it to the card with foam tape.
The Halo Piercing Die created a fun background. I chose the longest lines and added stitches of silver metallic thread. That very vintage “sputnik” design has a vintage feel that pairs perfectly with the radio design.
To create more depth (which helps it stand out more) I stacked the silver “celebrate” die cut on top of two layers of black die cuts.
Colors:
cardstock: Concord & 9th Avocado, Artichoke, Tidepool, Lakefront, Midnight, Cocoa, Black, Matte Silver Foil.
ink: Artichoke
other: metallic silver thread
Techniques:
I really love the design of this radio, and was considering making it a pop-up, but decided to go all in and make it 3D.
My first step was assembling the front of the radio, with most of the die cut layers. I knew it would be easier to adhere them securely while it was flat. I did save the buttons for later, because I used small foam adhesive behind those, and needed it to be fairly flat to adhere the side strip.
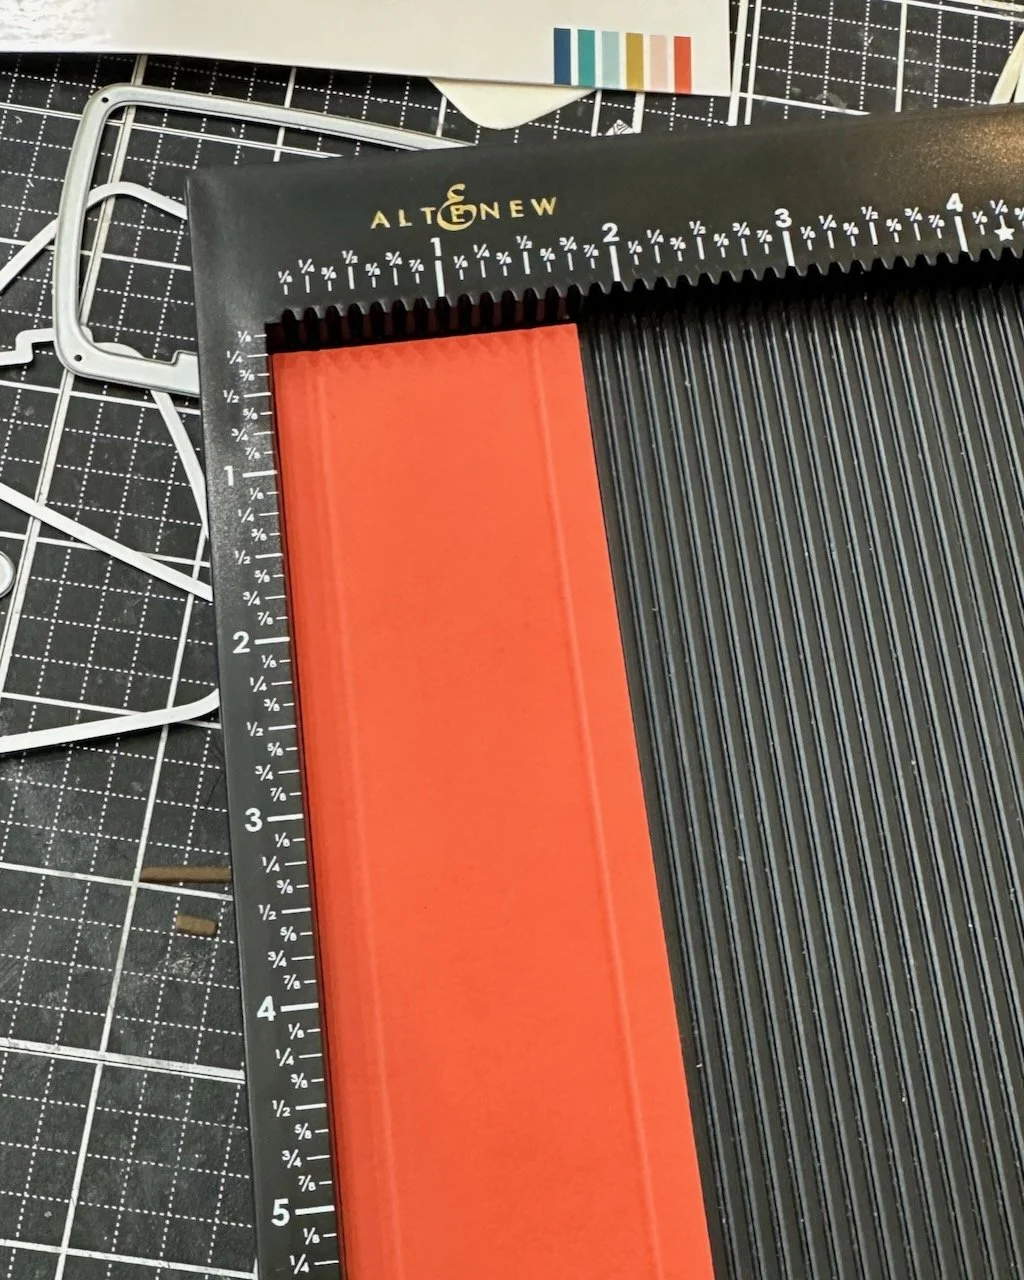
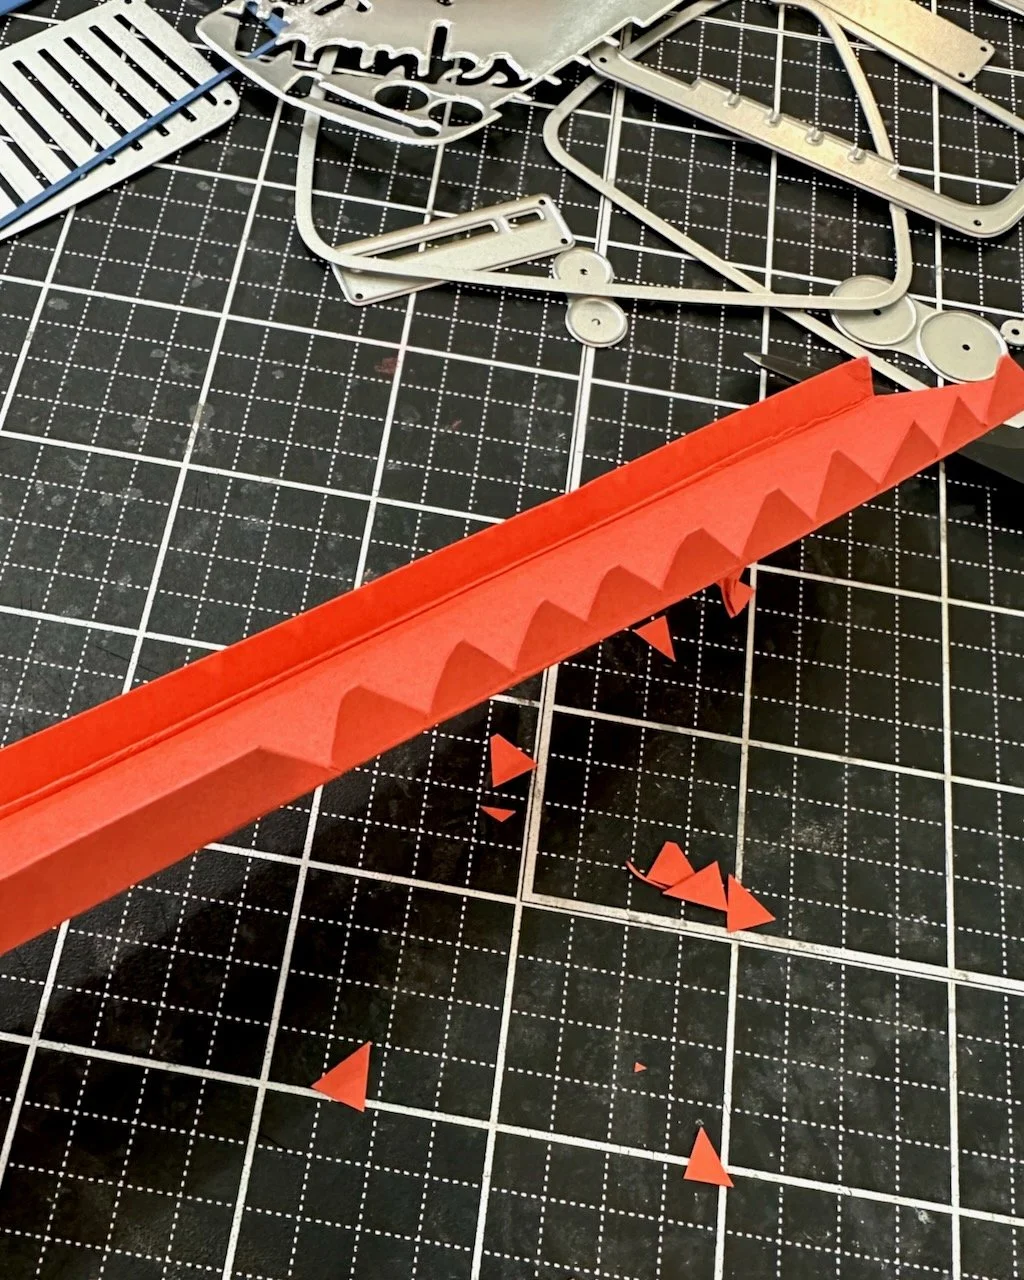
For the dimension, I cut a strip of cardstock long enough to wrap the sides and top of the radio, and to give me the depth I wanted. My strip was 9” x 1 3/4”. I knew I could piece in another for the bottom of the radio, but actually didn’t even do that because I realized it didn’t show in this case.
I scored the strip 1/4” in on each of the long sides (see photo below) to create the piece that would fold and attach.
In order for that long folded flap to wrap around the curves, it needs to be either slit or notched. Cutting slits would work, but then those pieces all have to layer on top of each other and it can be challenging to get it to adhere well. I generally find that cutting notches out allows that full surface of the “tooth” to be flat to stick.
Once I had it all notched out (if you have large pinking shears that would work, but mine weren’t deep enough) I tested it around my radio and wen’t back in to create smaller “teeth” in the corner areas. Because the paper needs to curve more tightly, it needs more notches and less solid space in those areas. You can see this in the corner areas of the third picture below.
NOTE: Could I have been more precise and made my notches and “teeth” more consistent in size and more regular? Yes, of course. Does that matter in this project? Not at all. No one sees this (except those of you looking at this blog), so I decided it wasn’t a necessary use of my time.
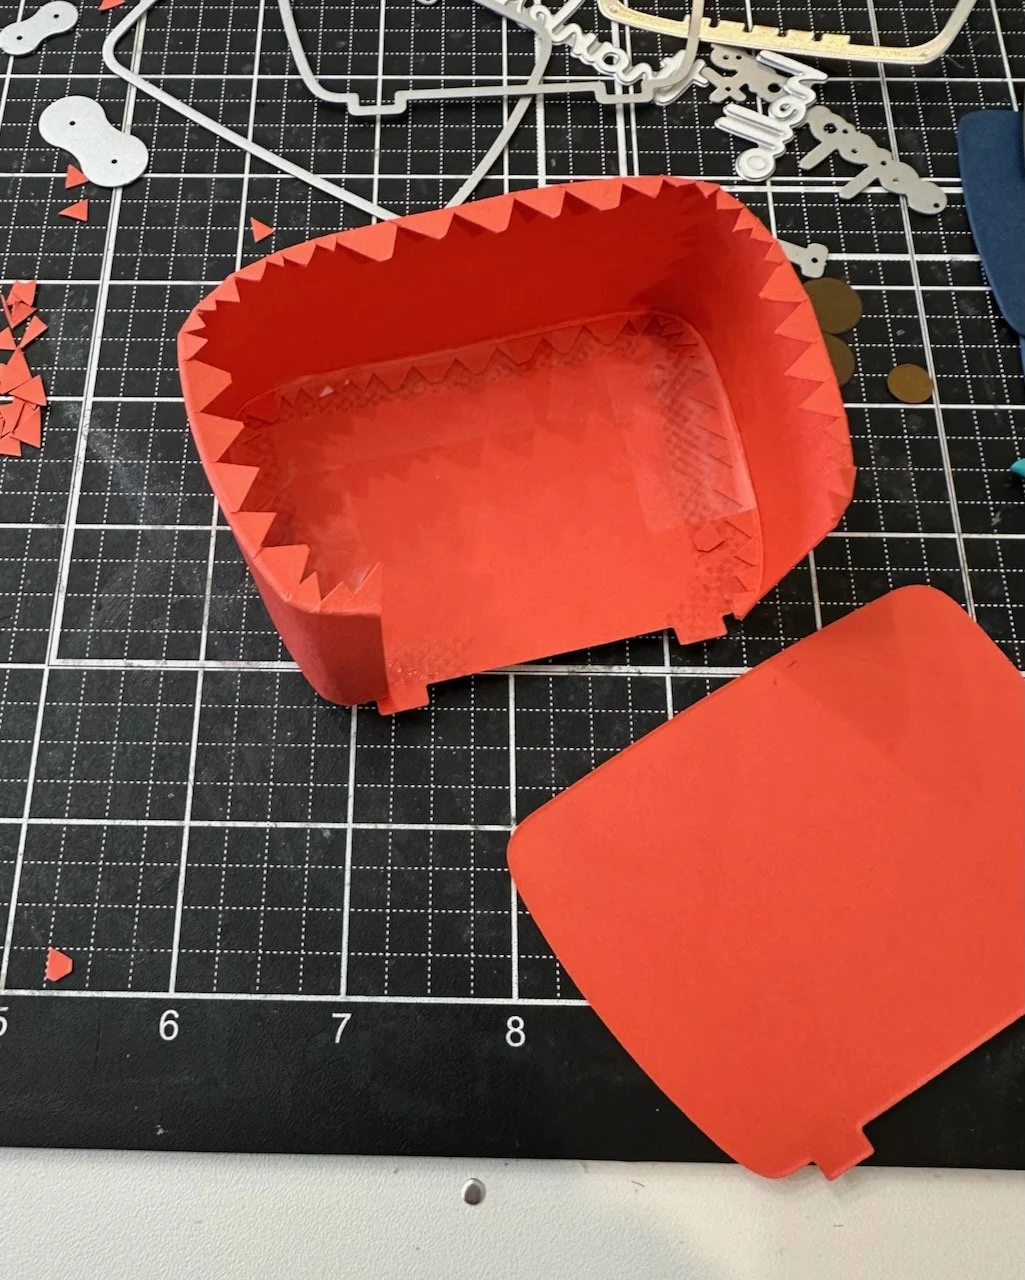
When the notched strip was ready, I put tape runner around the edge on the inside, as well as a line of my liquid glue. I knew the tape runner would grip and hold it in place right away, but I trust the glue to keep it in place longer once it dries.
Once I had that put together (third process photo below) I cut another base layer of the radio in the same color to be the back. I attached this one with just liquid glue, then set something on it that had enough weight to give it pressure without crushing it while it dried. (I found a small MISTI was perfect, but a large acrylic block or something would also work.)
The next two steps are important to consider together.
1. Since I wanted to have the main sentiment floating above, I knew I needed to secure a piece of sturdy acetate in the base.
2. I also wanted to stamp a sentiment on the back of the radio. (This isn’t necessary, but worked perfectly as a way to secure that acetate also.)
I cut one more base layer of the radio and stamped on it. I cut my acetate to be the height of the radio body + the amount I wanted it to stick up above + enough to tuck into the main sentiment that would be “floating” up there. The piece I used was 1 3/4” x 3 1/2”. I used my combination of adhesives again to attach that acetate to the back of the built radio, and then attached the stamped cardstock piece on that.
The “You Rock” sentiment was added onto the acetate in the same way. I attached in on the front of the acetate where I wanted it, and then added another layer of the shadow die cut to the back so the acetate is sandwiched between the two layers, and no adhesive shows. (I stamped on it first, but that isn’t necessary.)
Colors:
cardstock: Concord & 9th Pimento, Hazelnut, Cocoa, Matte Silver Foil.
ink: Pimento, Black.


Thank you for visiting! I hope you get some time to create something soon.
Links are below if you’re interested in any of the products I used.

*Affiliate links do not cost you any more when you shop, but it is beneficial to creators when you use them, so thanks in advance!