Stenciled Pattern: Same color, Two ways
Featuring: Kristina Werner Cara Medallion Stencil
One thing I love about Kristina’s stencils (beyond the designs themselves, of course) is that she’s. designed them to be large enough to cover a 5x7, or to create two A2 panels from. It feels like such a time saver, and also gives me an easy way to try more design possibilities for each color combination I stencil.
Here are two cards I created with one color palette, and one piece of stenciled pattern.
Techniques:
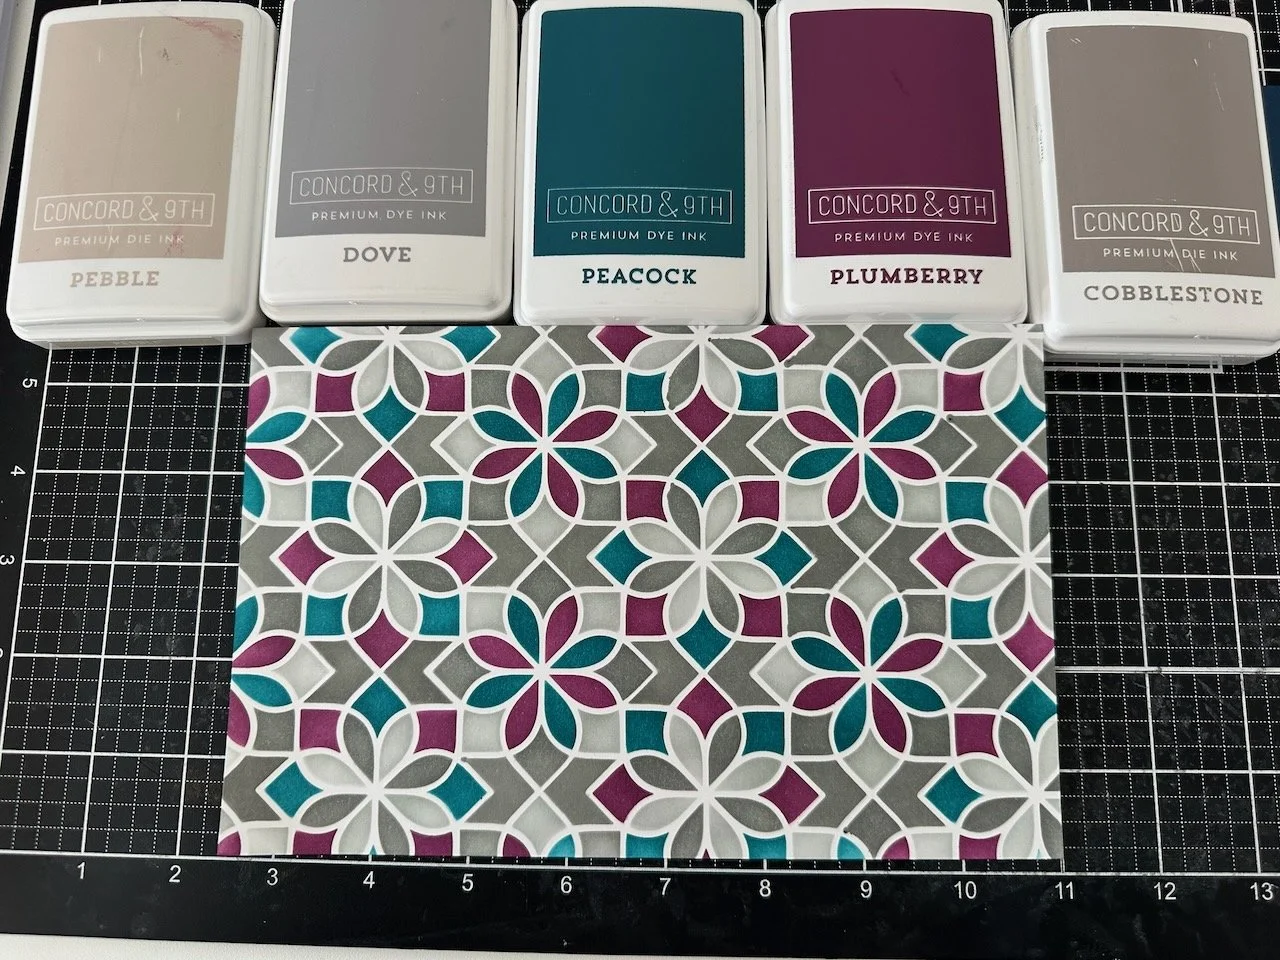
I chose a color palette made of a range of neutrals, and a pair of deep jewel tones that are similar in value to each other, and used that to stencil the full area. This left me with a large enough piece to get two A2 panels out of it.
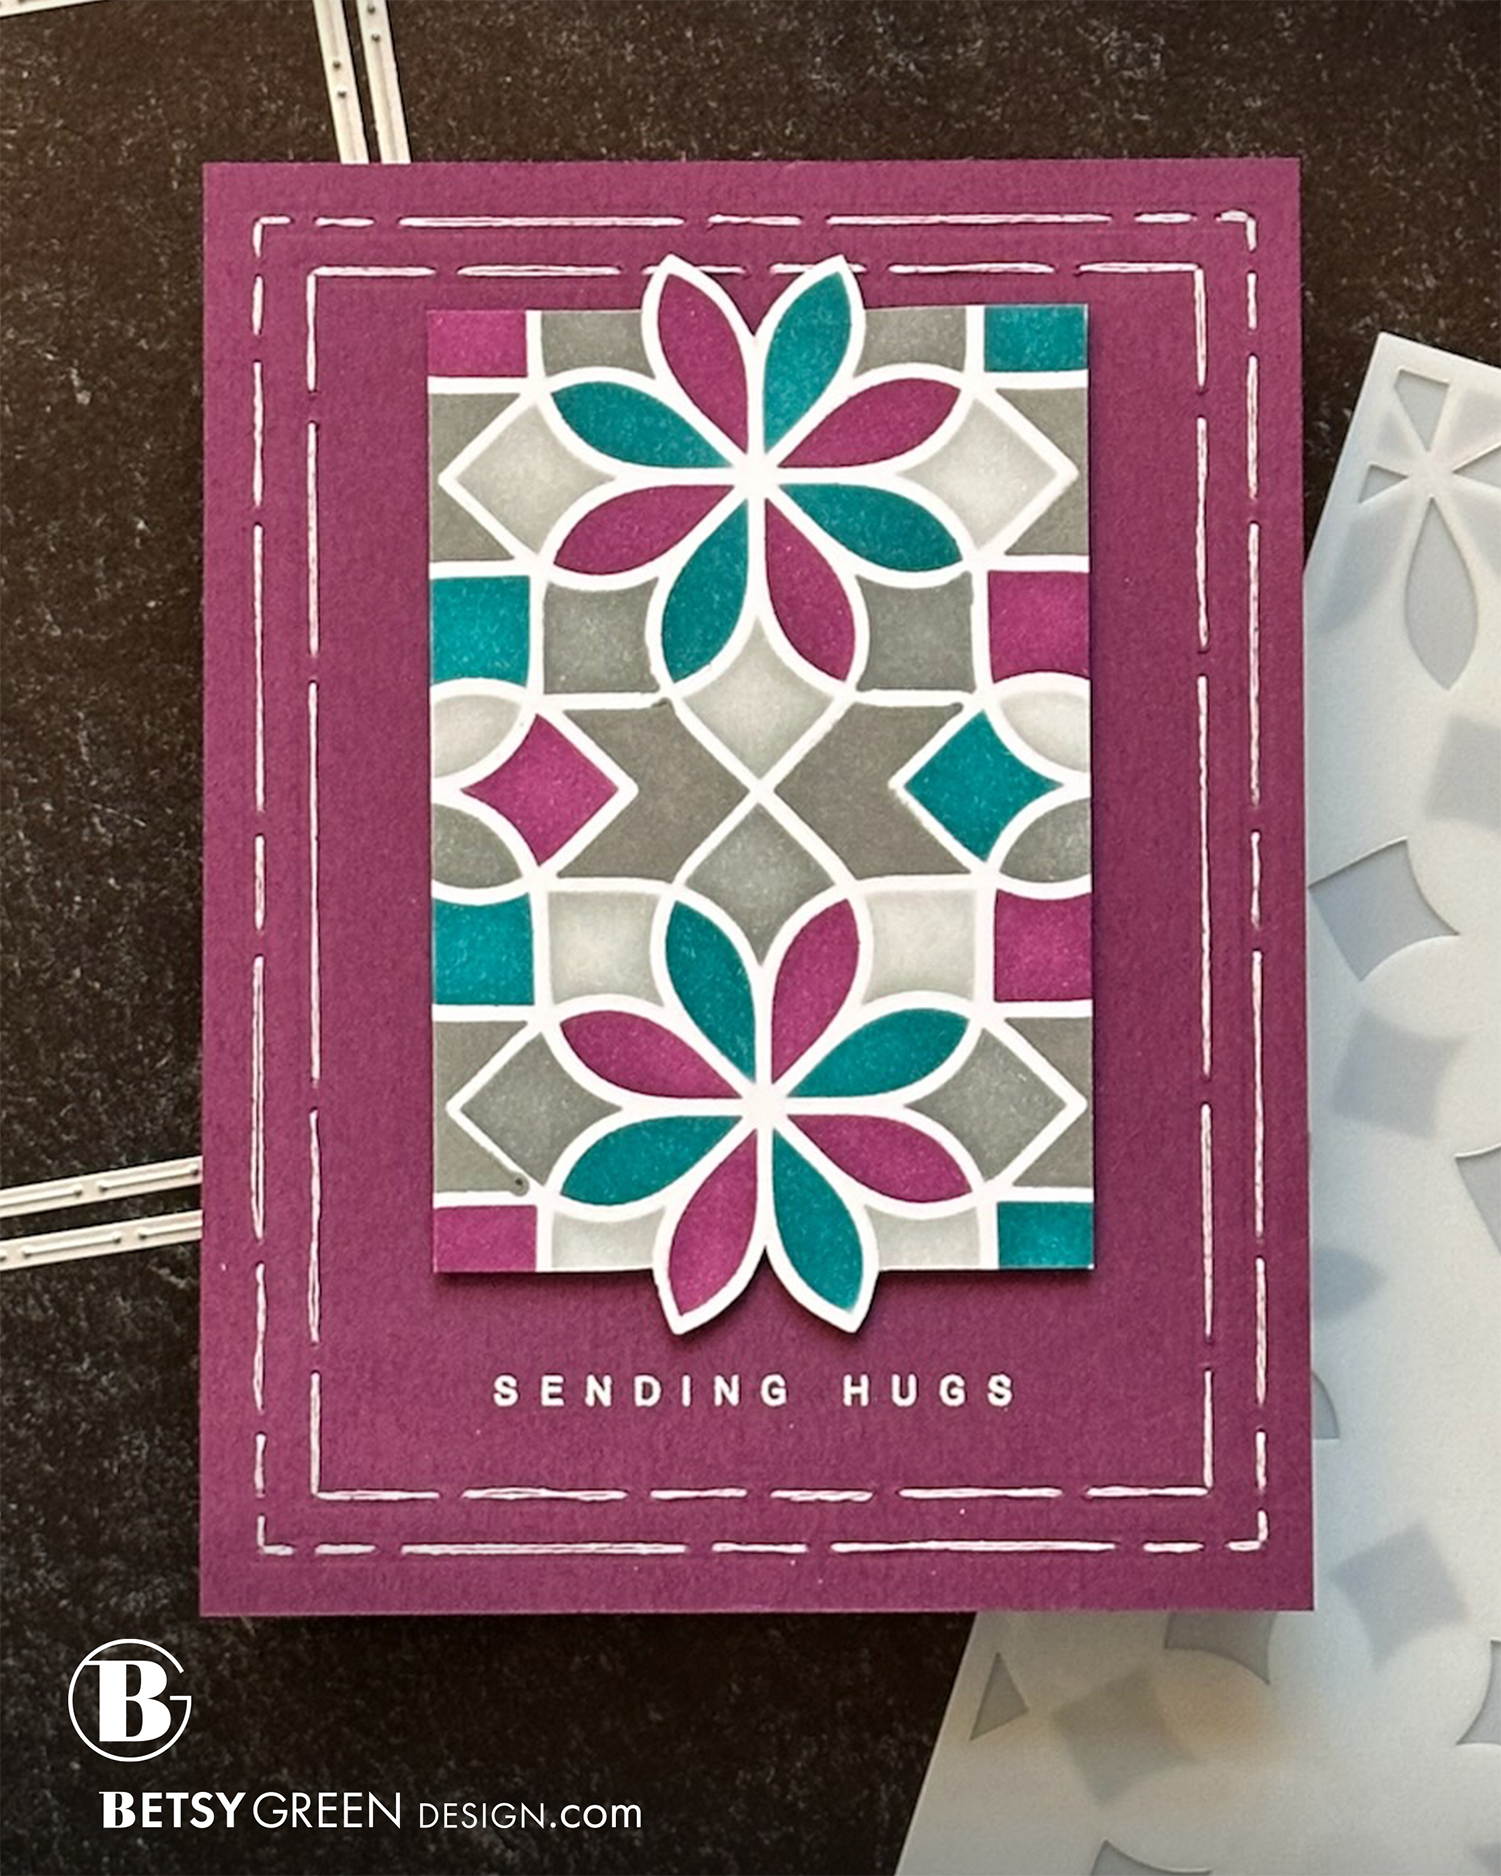
For this first card I wanted to highlight the flower shape in the pattern, so I cut out a section of the design that focuses on two of the Peacock and Plumberry flower shapes.
I trimmed the sides of it so the flowers were centered, and was careful to watch the spaces that were left because I didn’t want just a sliver of color. I cropped it in so that no odd little spaces were created by the trimming.
Along the top and bottom, I used my paper cutter just to create a notch in the top and bottom sides where I wanted the flat edge to be, but I didn’t cut it all the way off. I wanted to cut around the “petal” shapes so they could extend beyond that straight edge. I used that notch from the trimmer as my guide for how far into the design to cut those petal shaped pieced out, and then followed that straight edge the rest of the way to the petal.
I cut the petal shapes out on the outer edge of the white border, so it would have more contrast with the background and highlight that shaped edge.
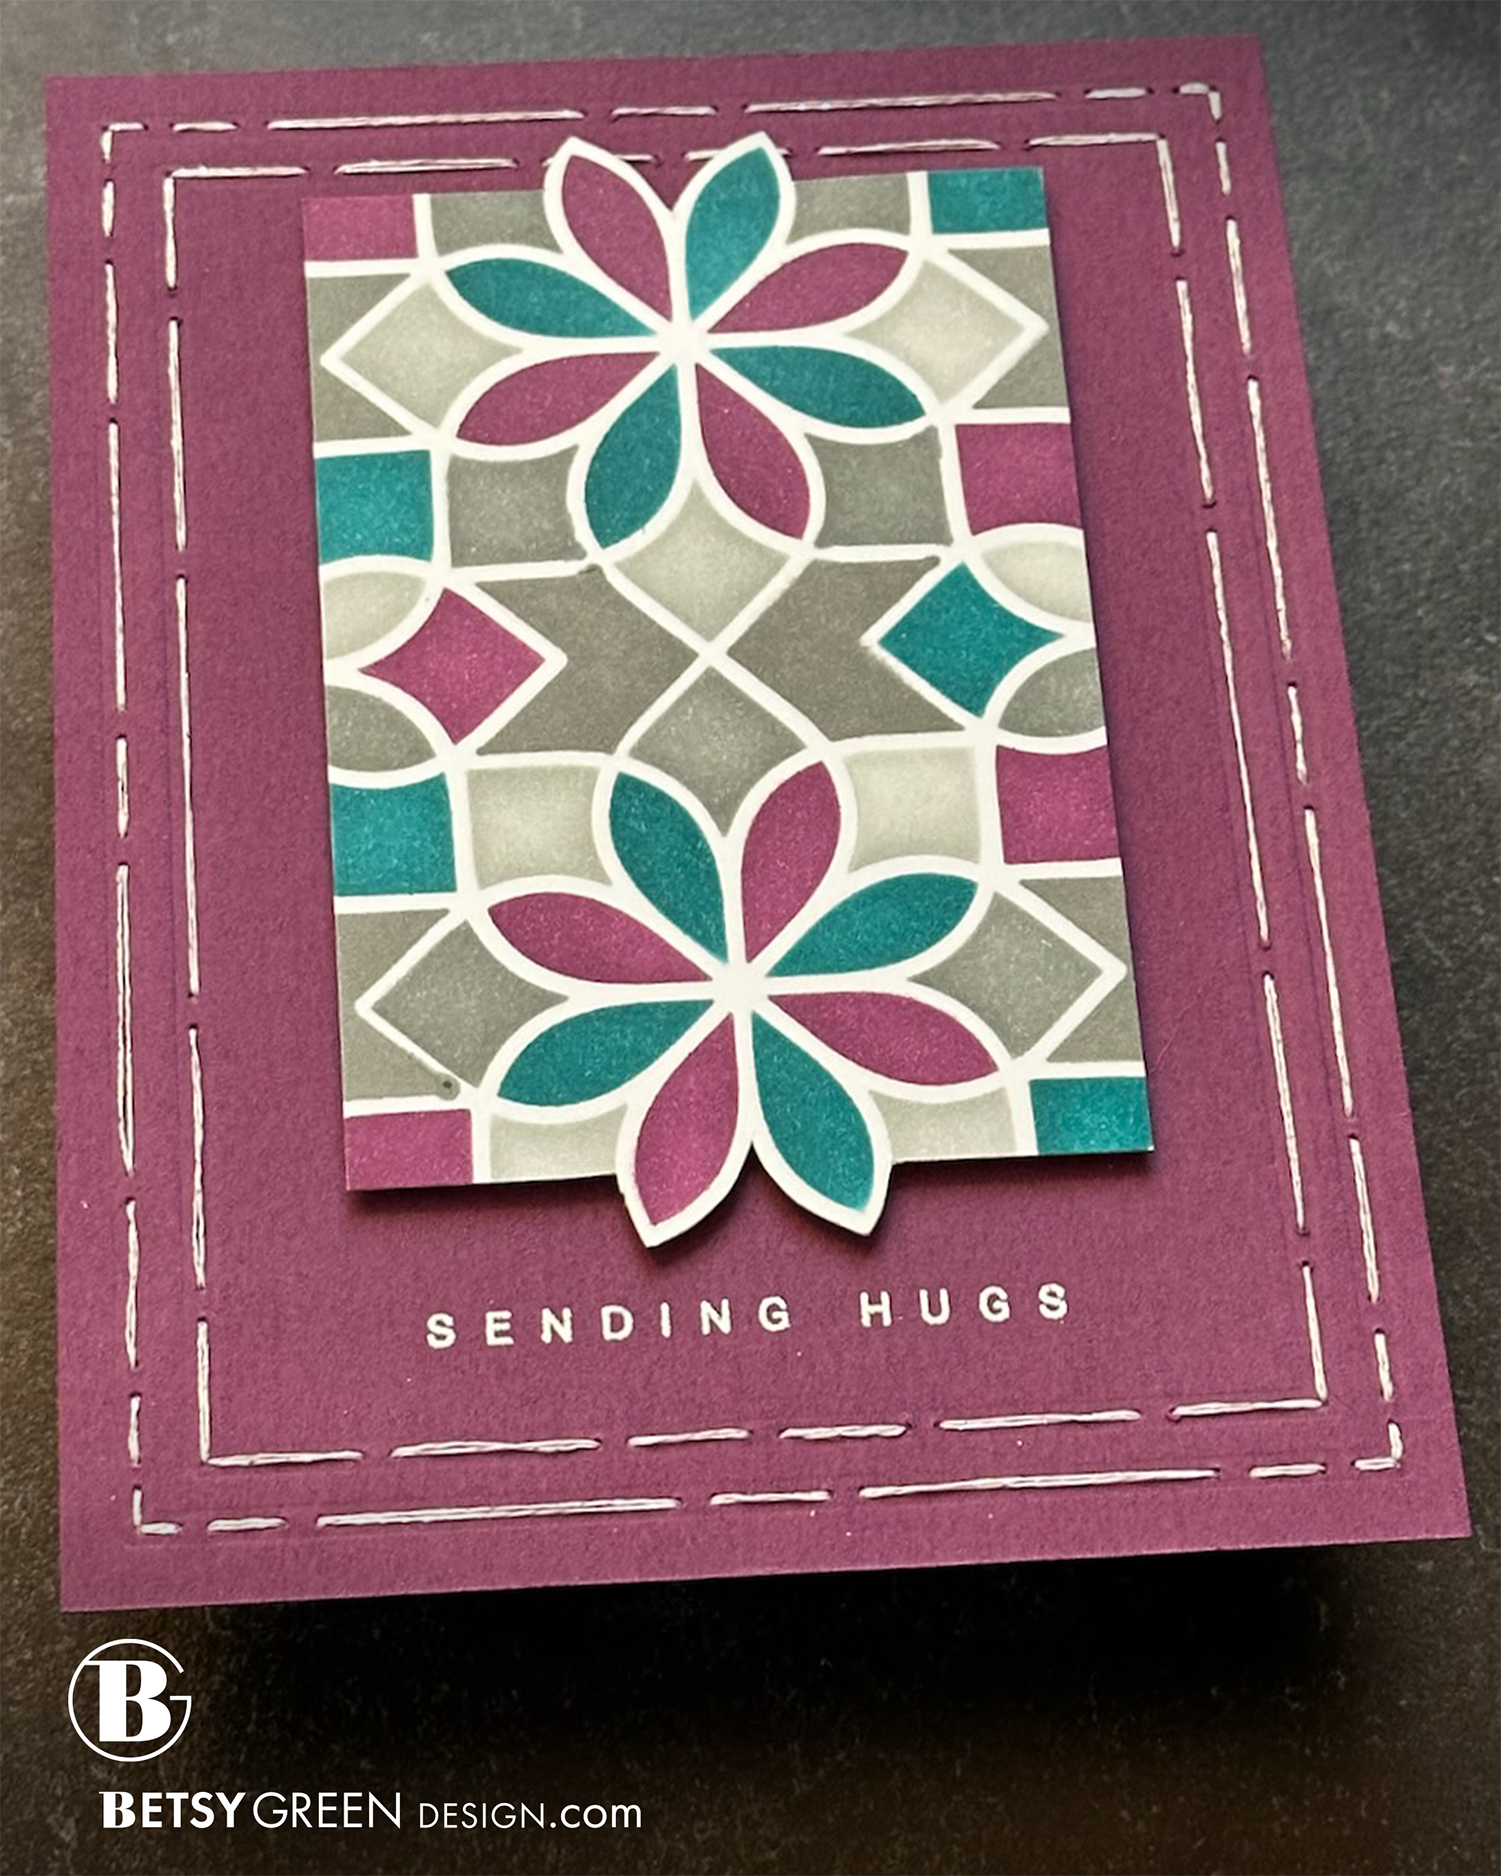
I then used two of the Rectangle Frame Piercing dies on my Plumberry A2 panel for the background. I stitched in those frames with the White Iridescent Thread from Concord & 9th.
For the greeting, I stamped and embossed one of the small greetings from the Everything Will Be Okay stamp set. Doing that in white ties it in to the frame of the stenciled art, and the stitched pattern. (I actually did this after die cutting the frames, but before stitching them.)
As the final touch, I attached the stenciled and cut out panel with foam tape so it would have dimension from the background panel. That adds shadow and additional highlight to the shaped edge.
Colors:
cardstock: Concord & 9th Plumberry. White.
ink: Concord & 9th Plumberry, Peacock, Dove, Cobblestone, Pebble.
Techniques:
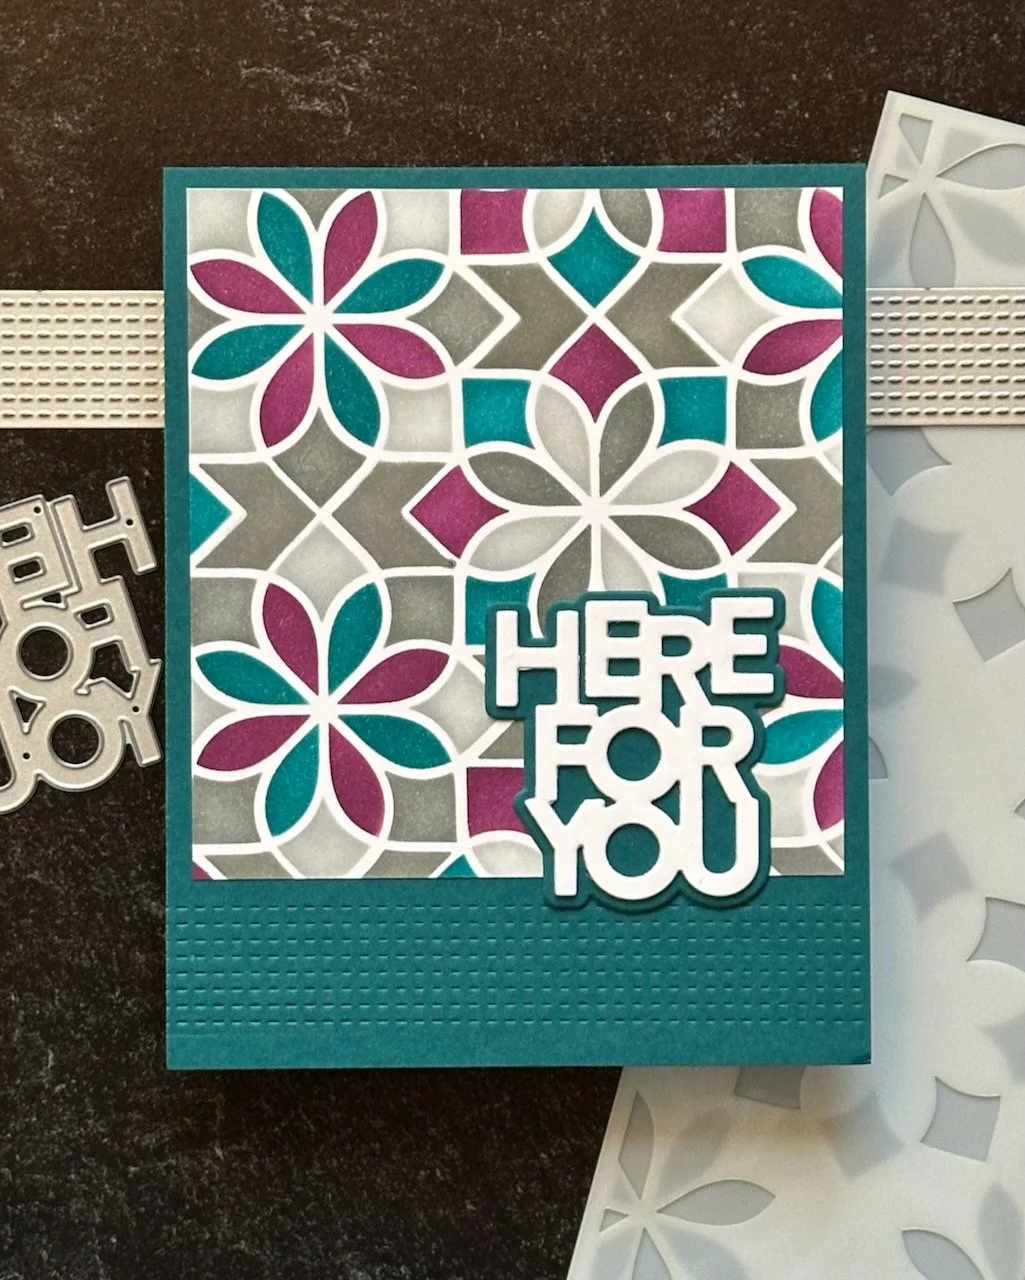
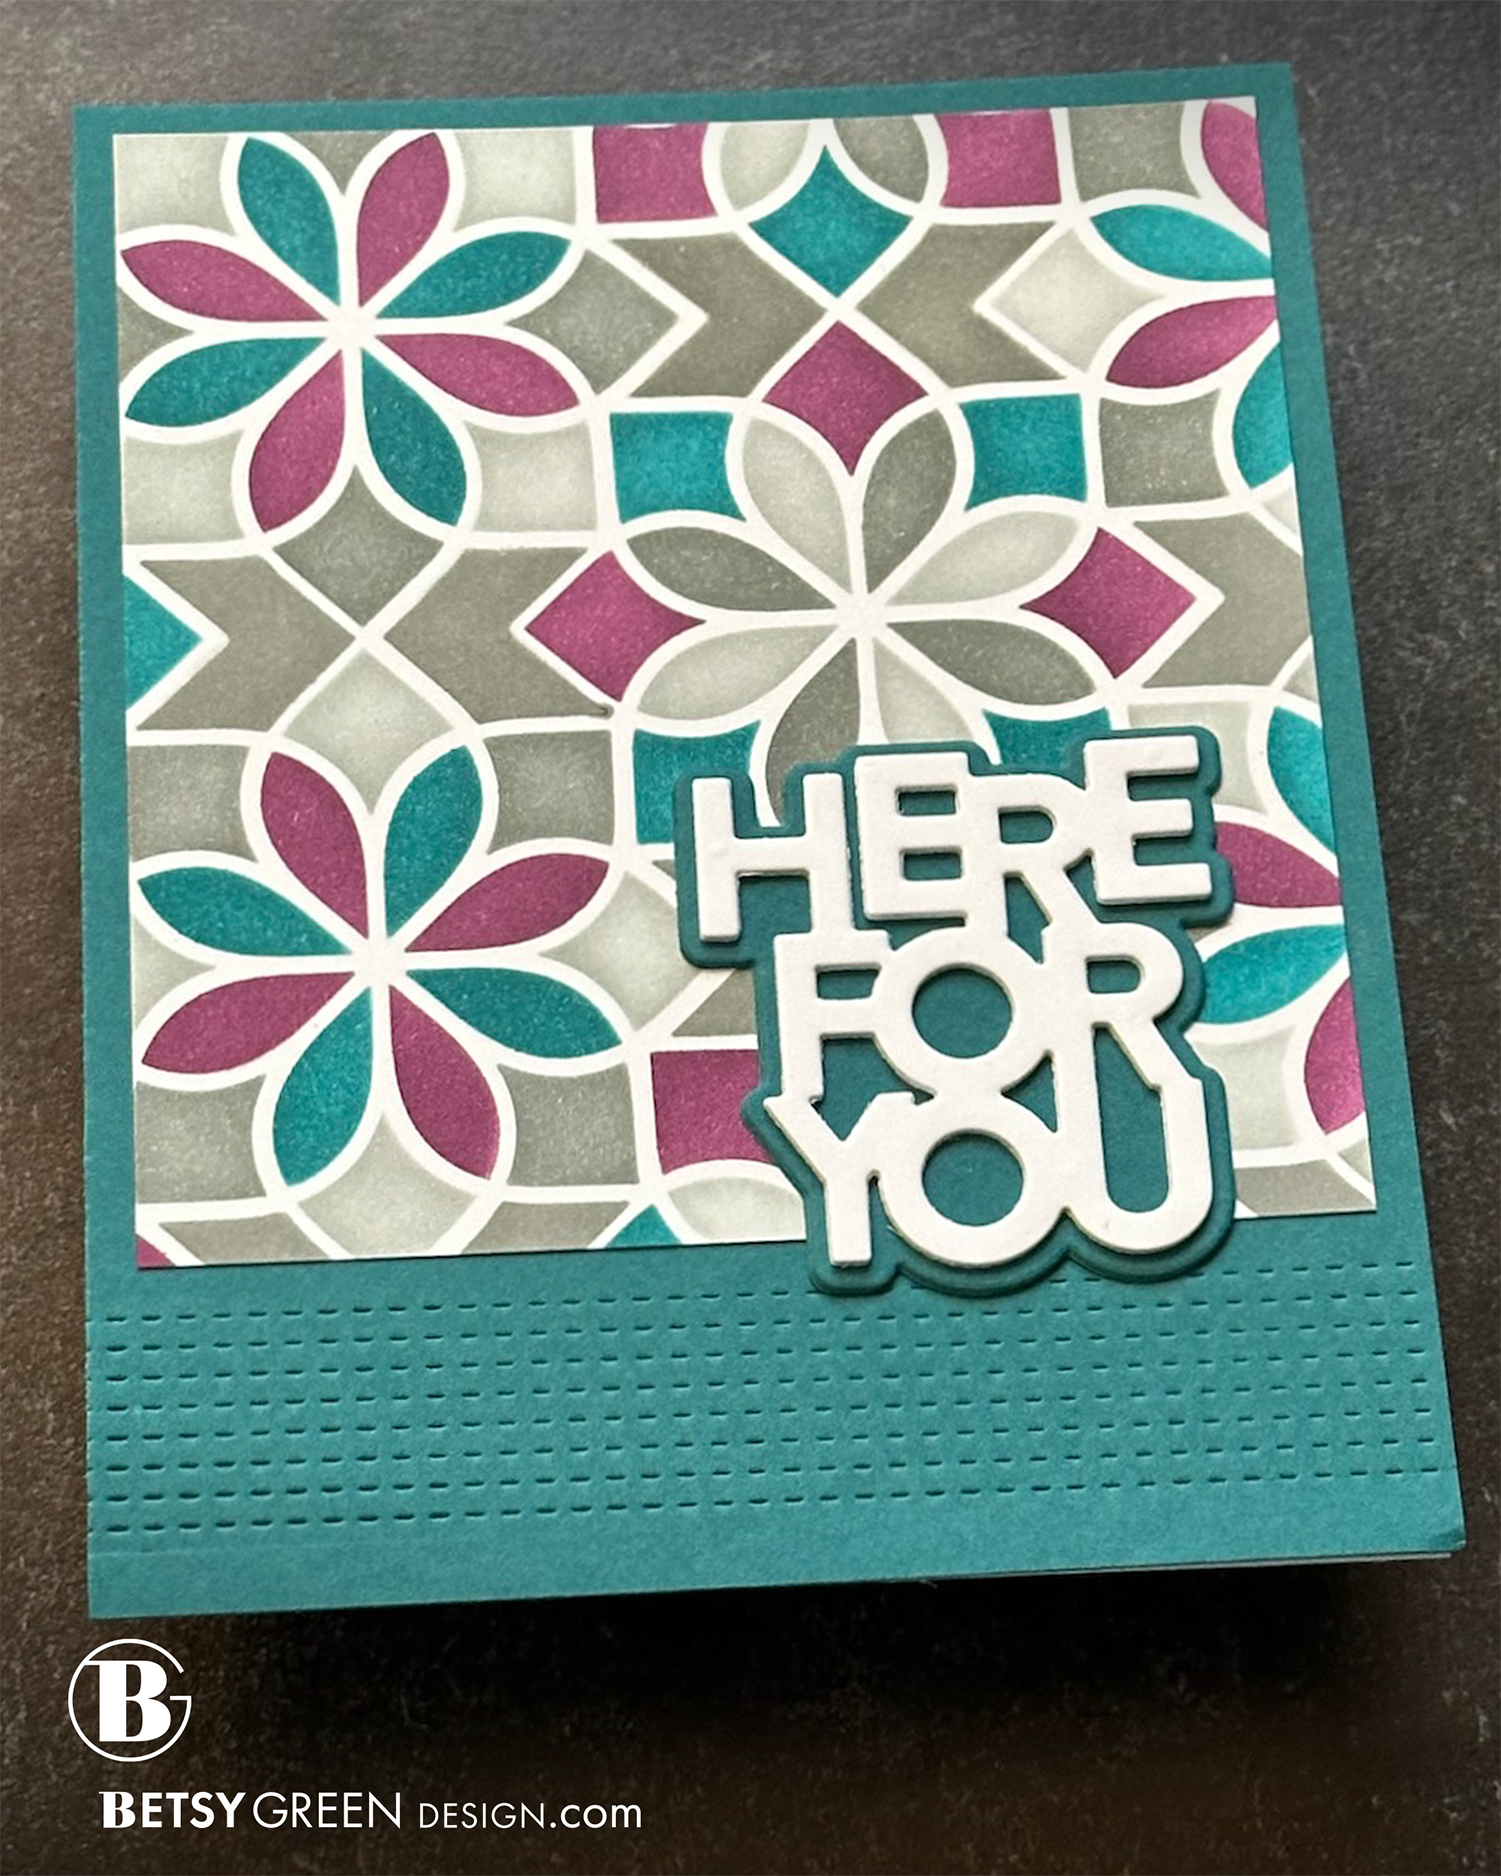
Of the two designs here, this is a much more simple design since I just trimmed the panel out with straight edges.
The first card showed the flower shapes centered, so this time I left them offset. I knew that a bold greeting would help add asymmetric balance to the design.
I also included texture and some subtle pattern at the base of the card with a ribbon of debossed stitched pattern from one of the dies from Kristina’s Finishing Touches.
Colors:
cardstock: Concord & 9th Peacock. White.
ink: Concord & 9th Plumberry, Peacock, Dove, Cobblestone, Pebble.
Thank you for visiting! I hope you get some time to create something soon.
Links are below if you’re interested in any of the products I used.

*Affiliate links do not cost you any more when you shop, but it is beneficial to creators when you use them, so thanks in advance!