One Color Palette + One Stencil Set = Three Variations
October 2025 Kristina Werner Design
I love setting up design challenges for myself. Especially with new products. I love to try variations and see what I can do with things, so that’s what this blog is about. The only hard part for me is stopping. Once I start and have time I feel like I could keep going, but an often stopped by time (and in this case some travel), so I knew I had to wrap it up in a day. I still have more ideas, so maybe I’ll add to this post later in the month…
So here it is:
One modern Christmas-inspired color palette:
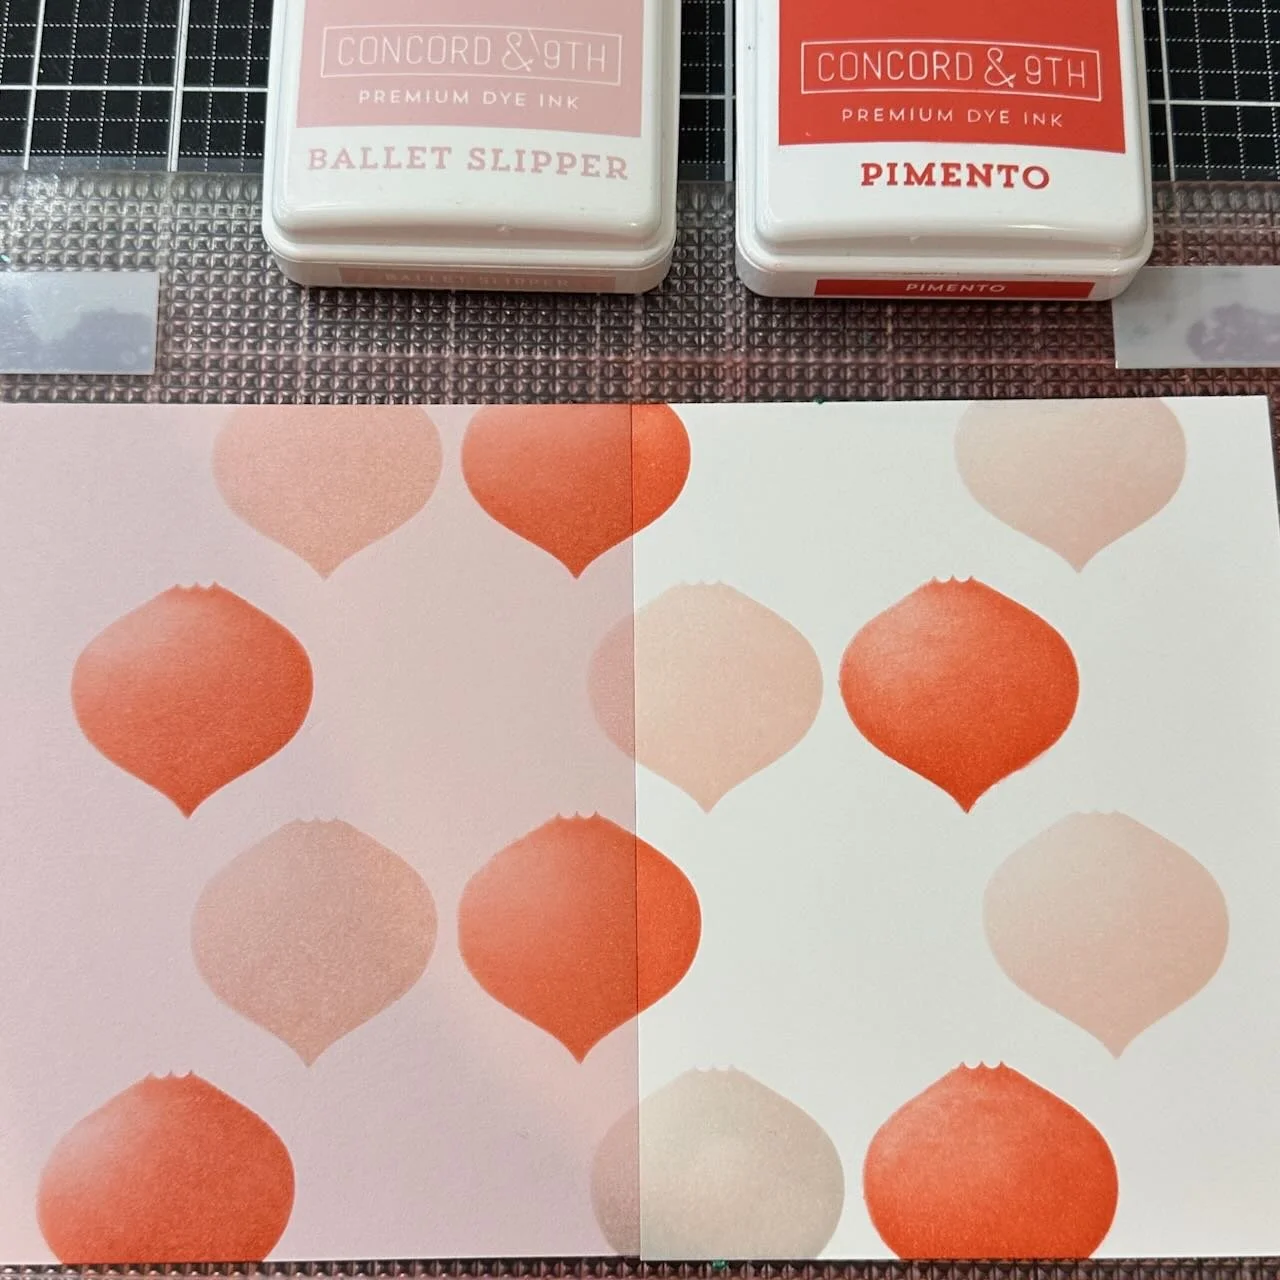
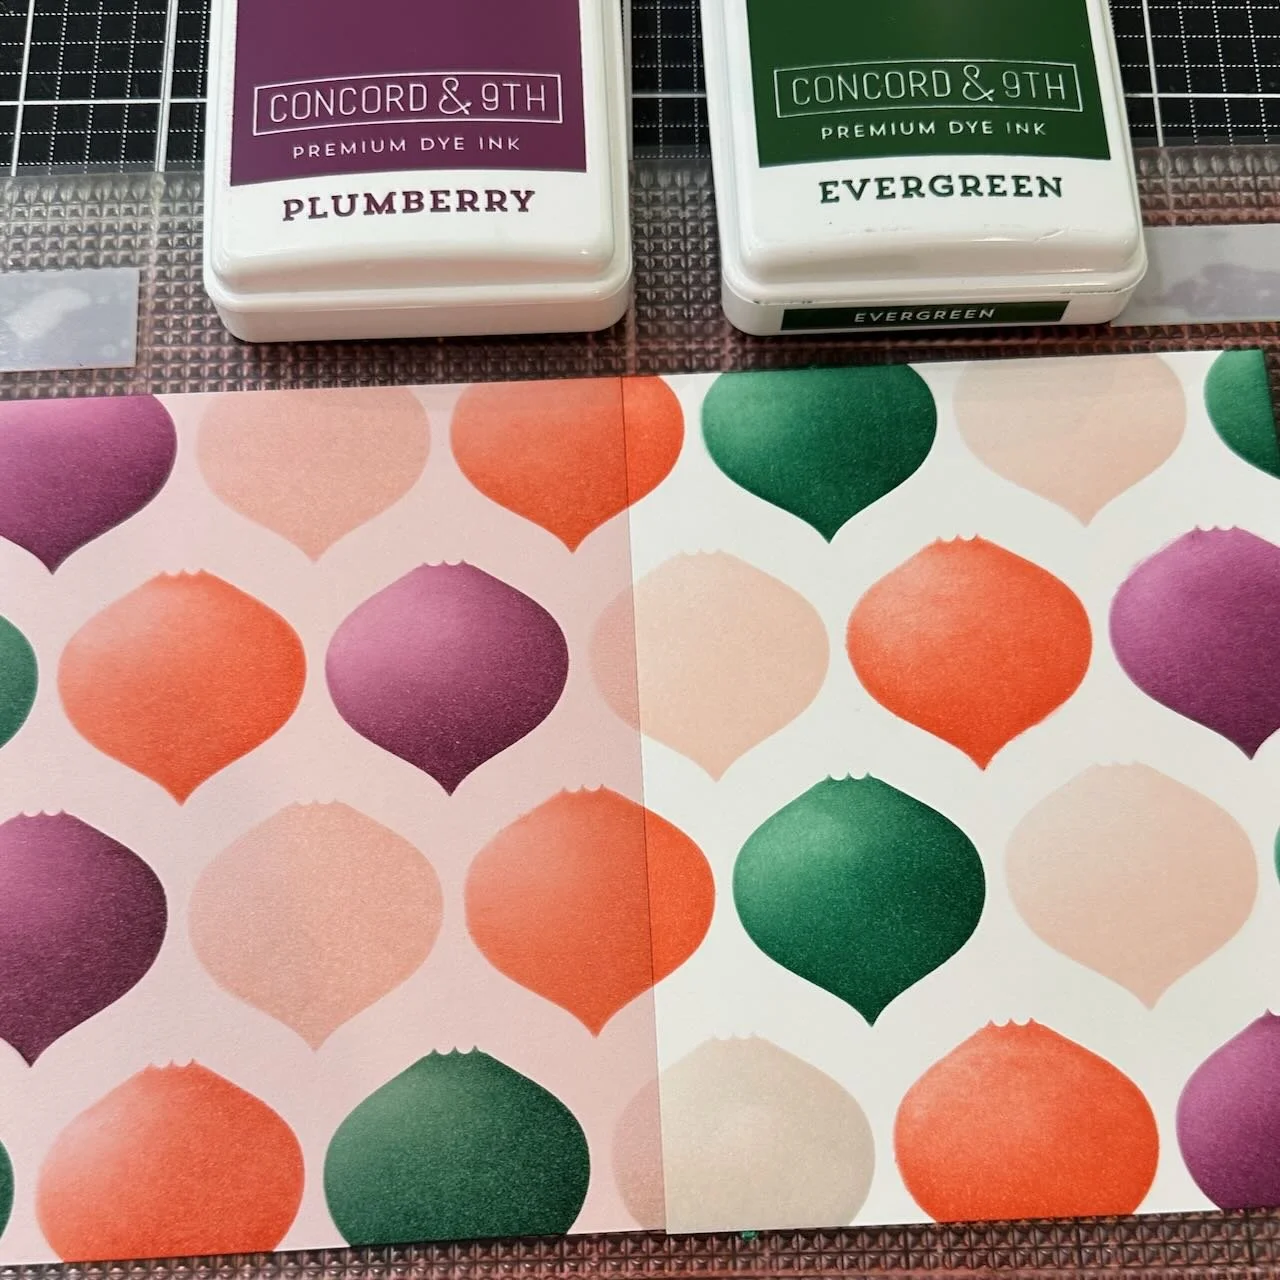
Plumberry, Ballet Slipper, Pimento, and Evergreen.
The stencil set:
The brand new Ornaments Stencil Pack from Kristina Werner (at Concord & 9th)
One stamp set:
Also new, the Simple Christmas Stamps & dies from Kristina Werner (at Concord & 9th)
Mixed in with a few mixed media pastes and other accent products.


Techniques:
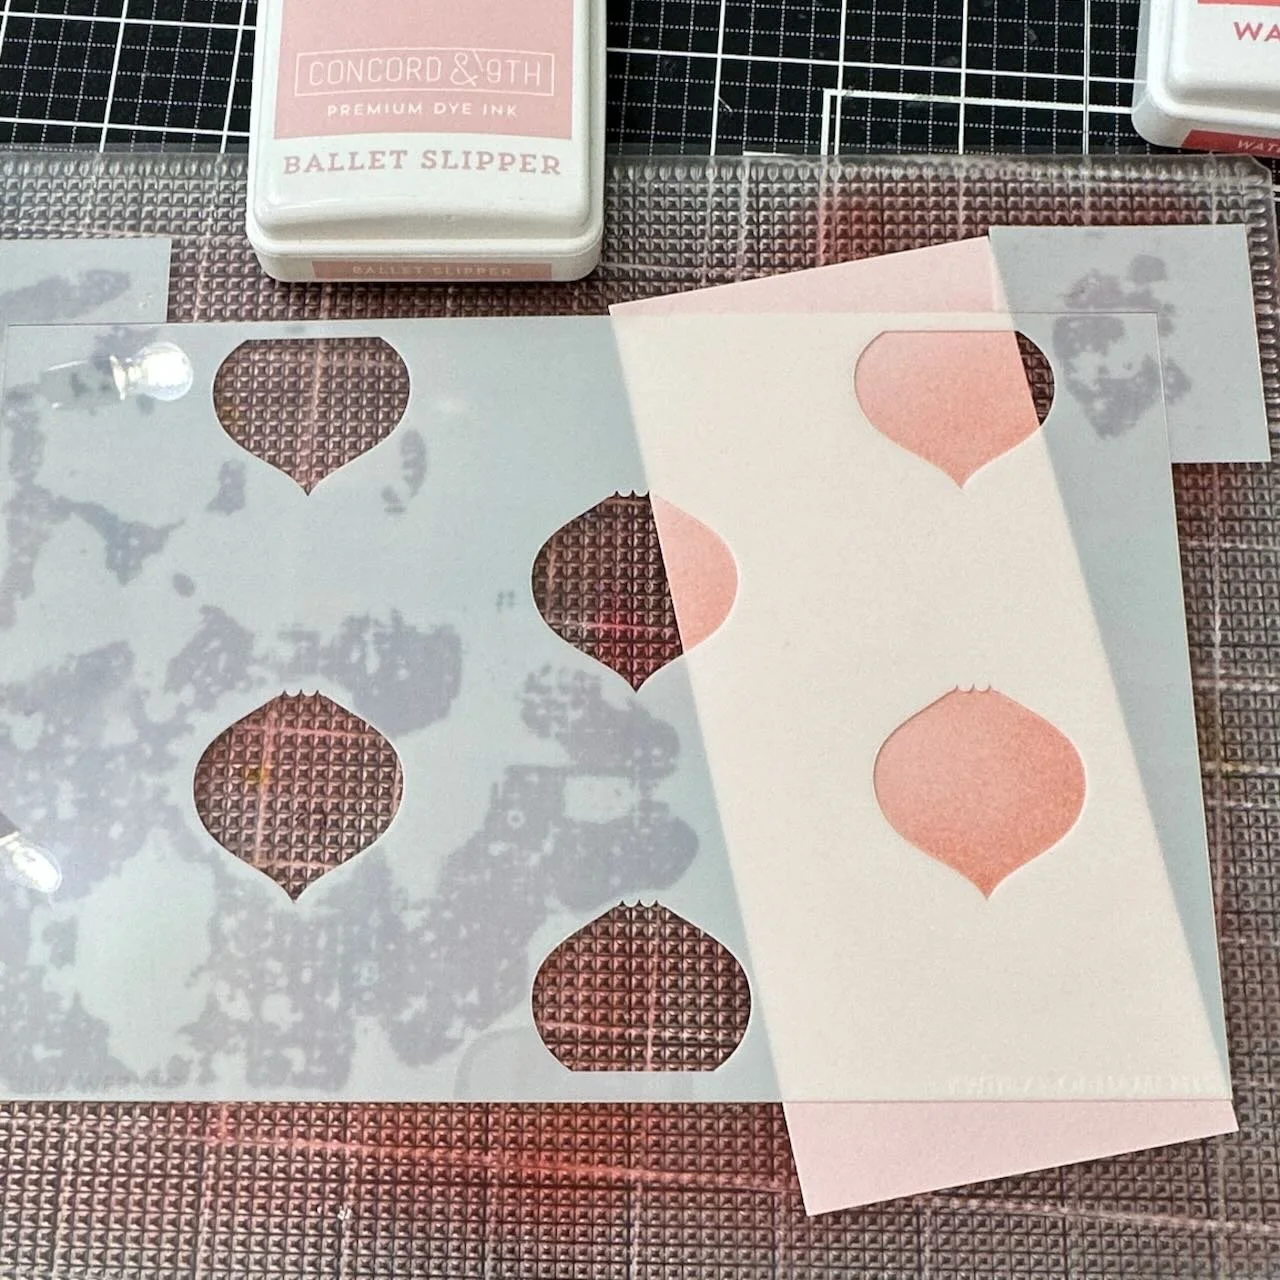
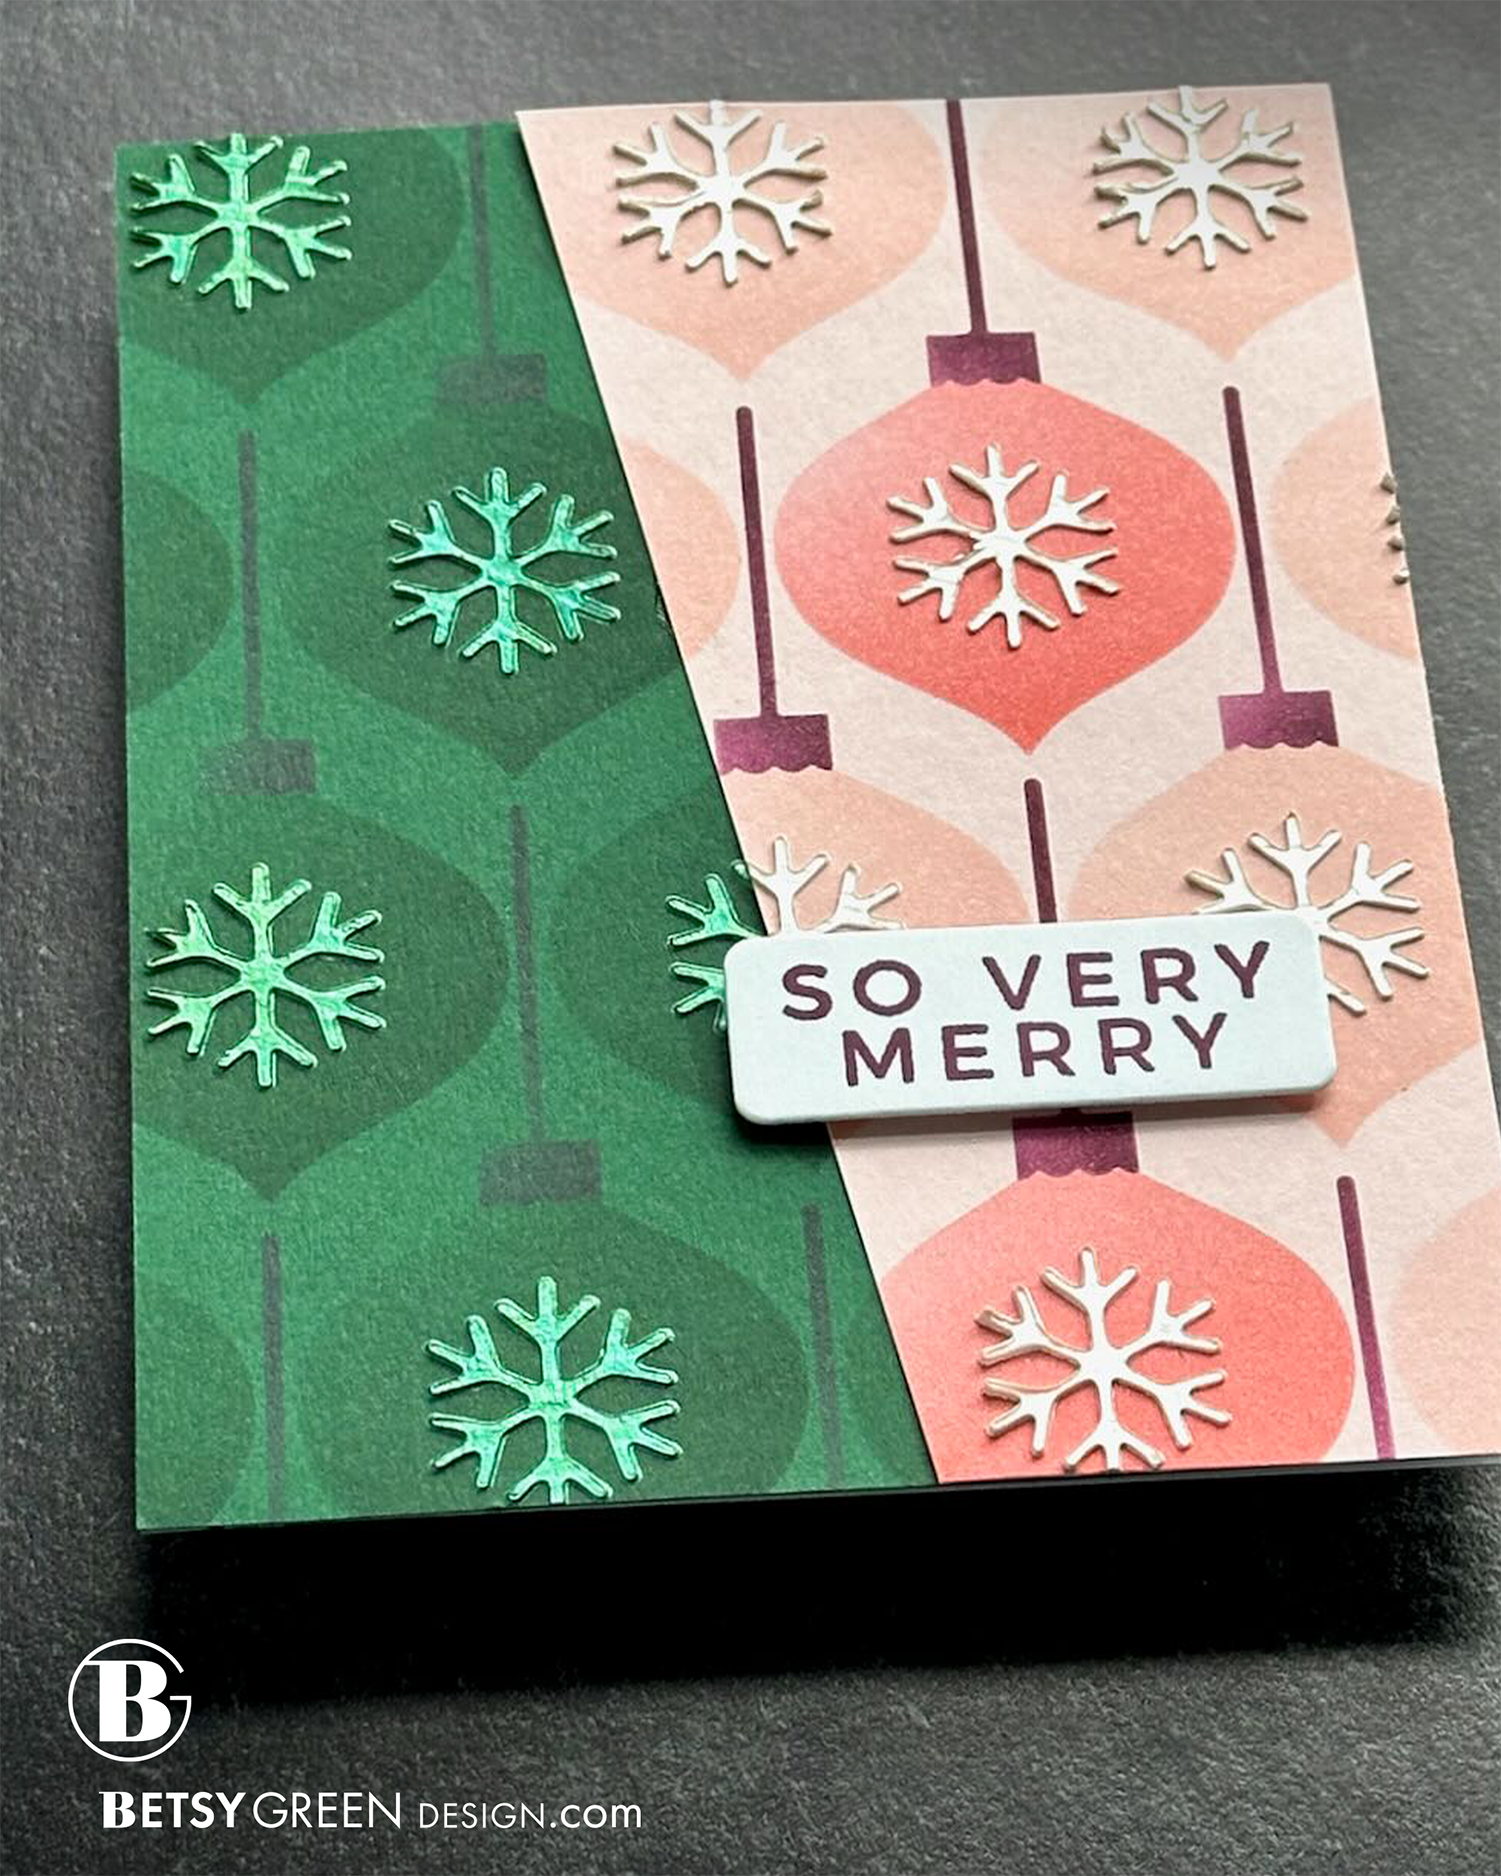
The goal here was to play off the contrast between the deep Evergreen and the much more pale Ballet Slipper.
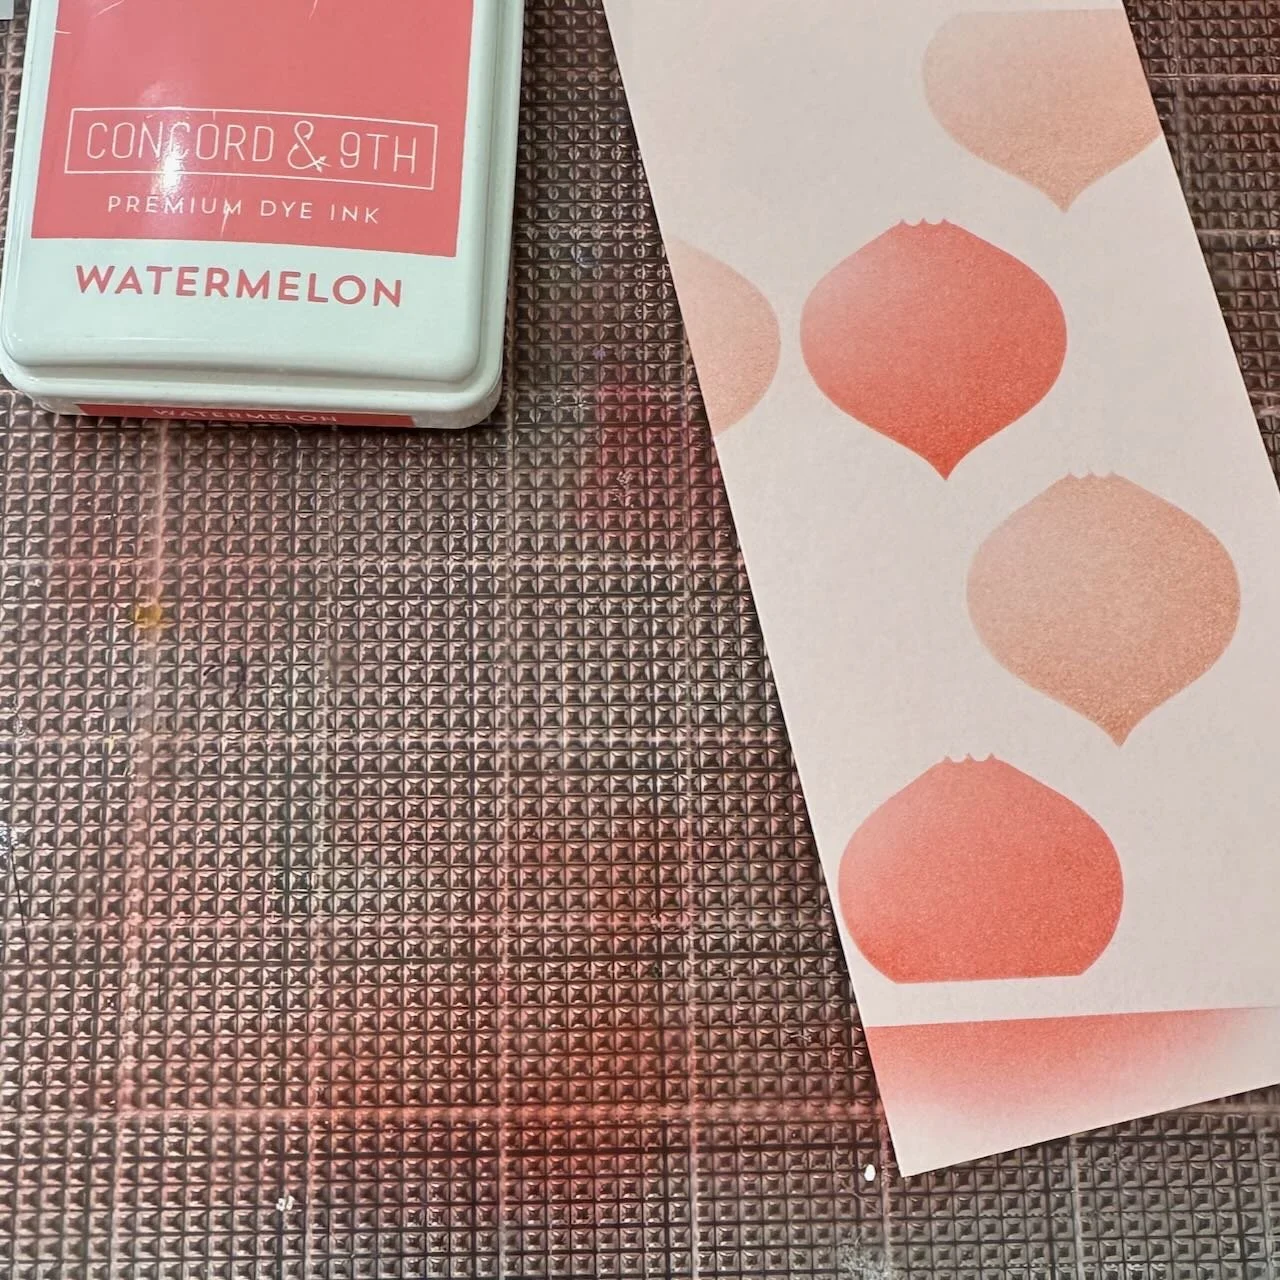
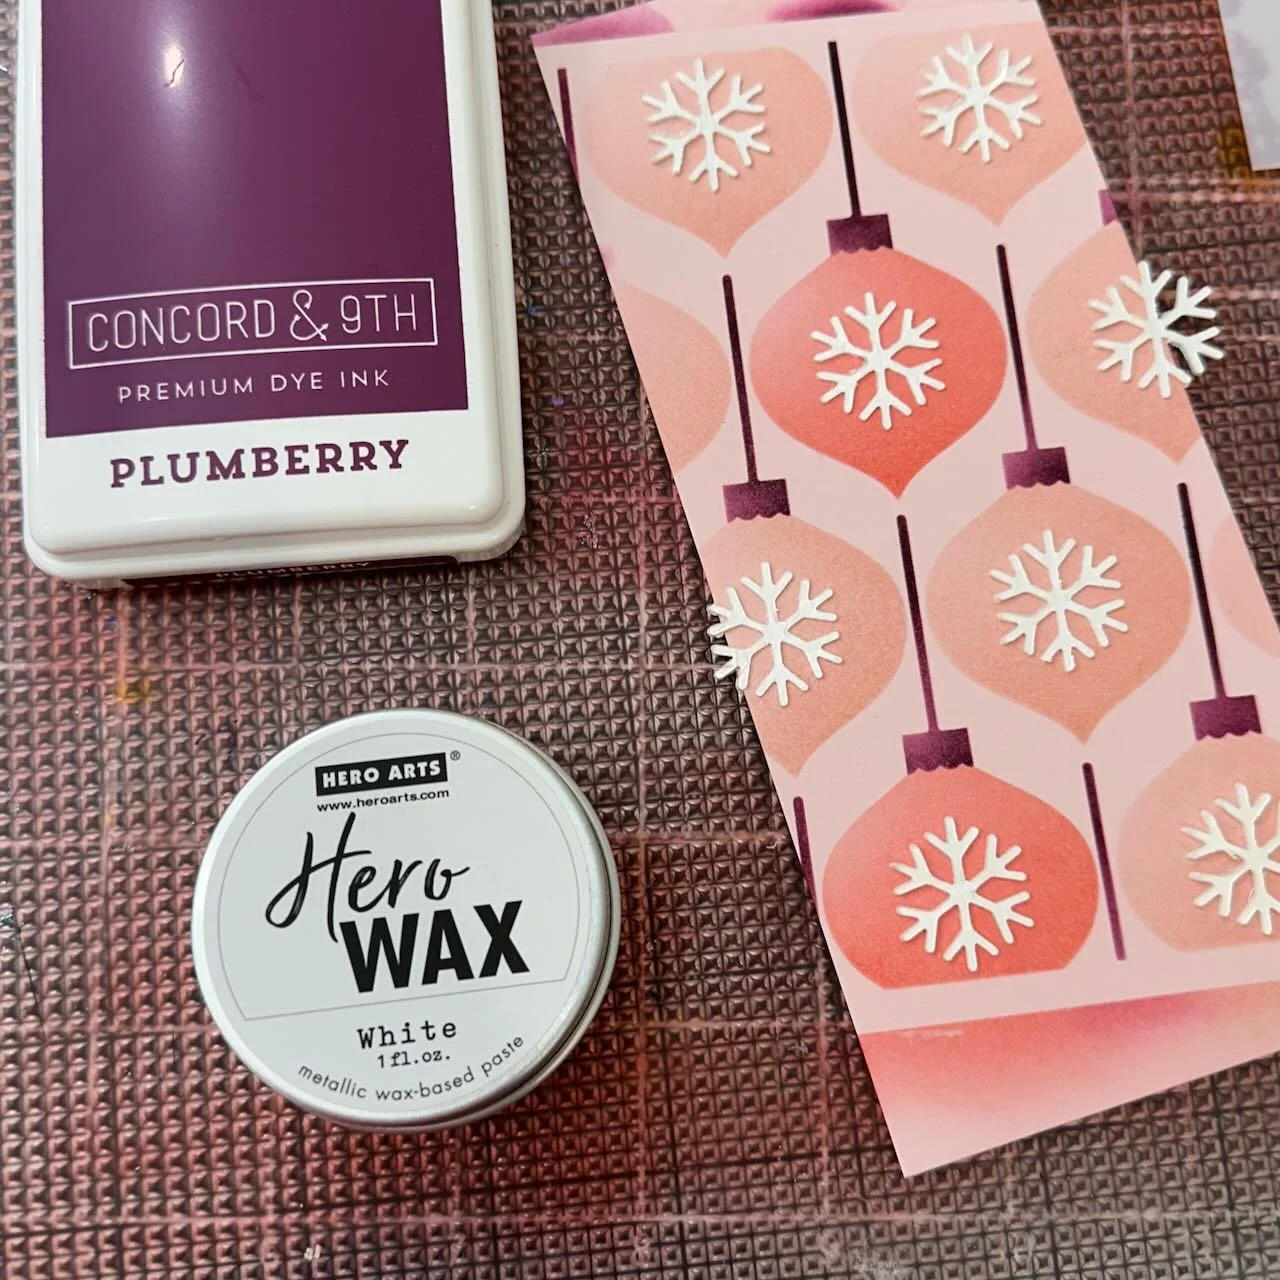
On the Ballet Slipper, I stenciled the ornaments in Ballet Slipper and Watermelon, with the ornament hangers in Plumberry.
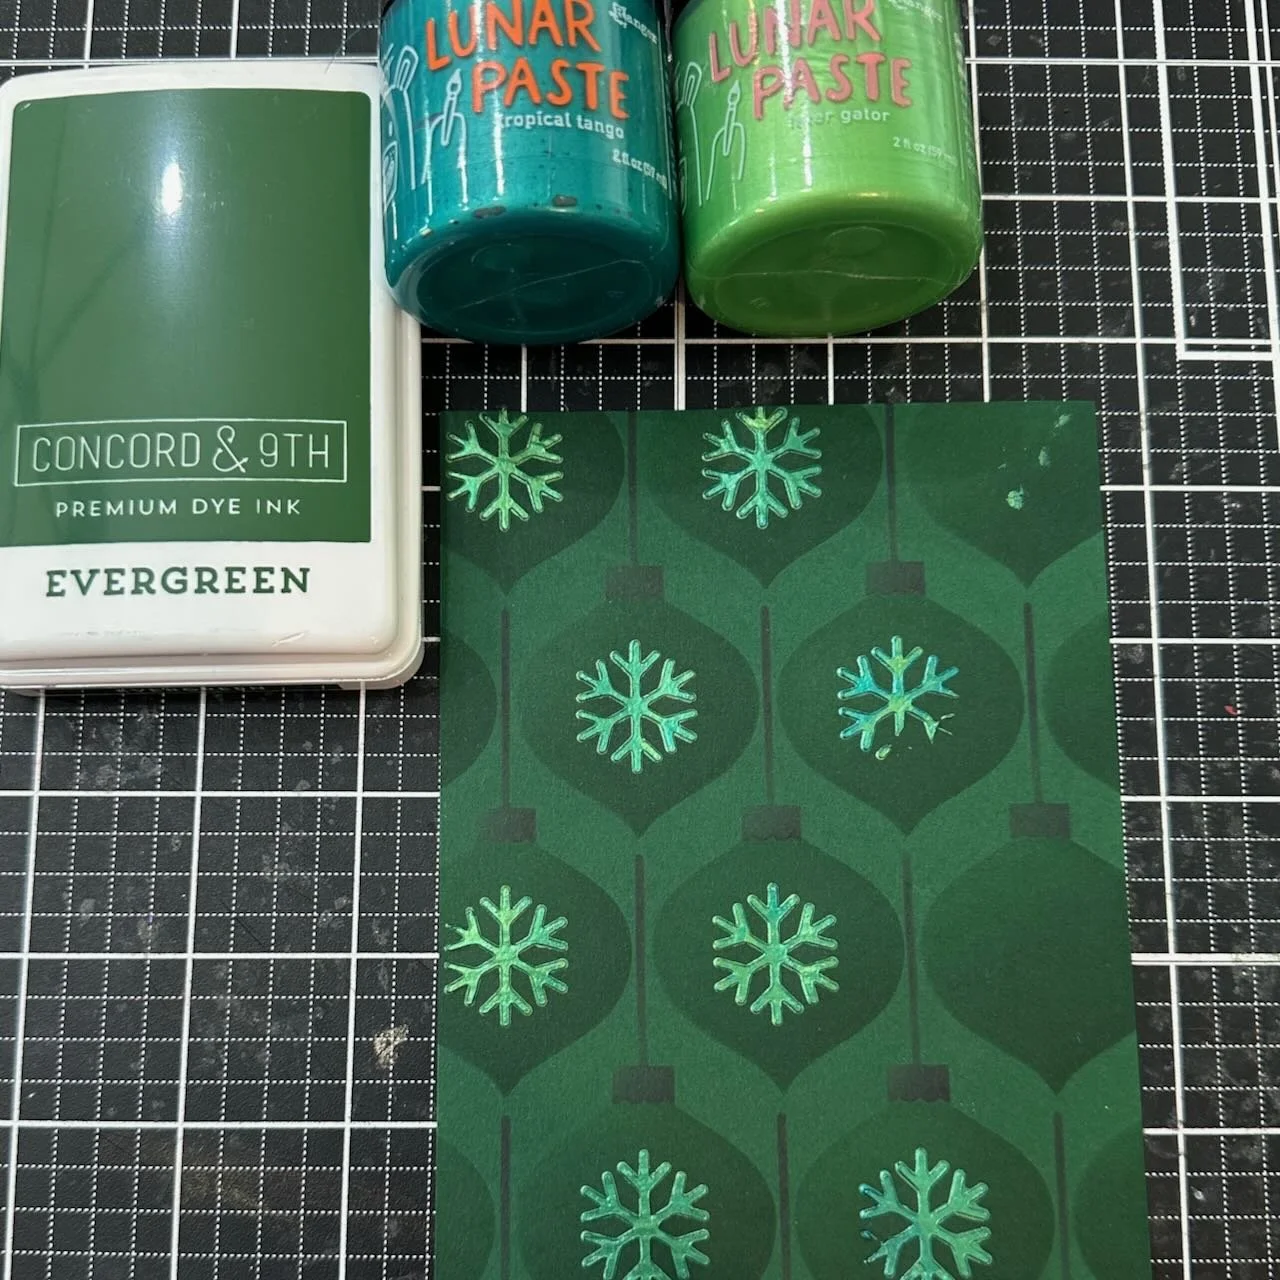
On the Evergreen, I stenciled all the ornaments in Evergreen, and used Mushroom for the hangers.
I wanted to use the snowflake stencil for some paste detail for the ornaments with the snowflake stencil (included in the pack).
The only opaque white shimmer I had was the Hero Wax, so used that on the Ballet Slipper panel.
I didn’t have the shade of green I wanted in a paste, so I mixed two colors of Lunar Paste to get the right effect.
Colors:
cardstock: Concord & 9th Ballet Slipper, Evergreen, White.
ink: Concord & 9th Plumberry, Ballet Slipper, Watermelon, Pimento, Evergreen, and Mushroom.
Techniques:
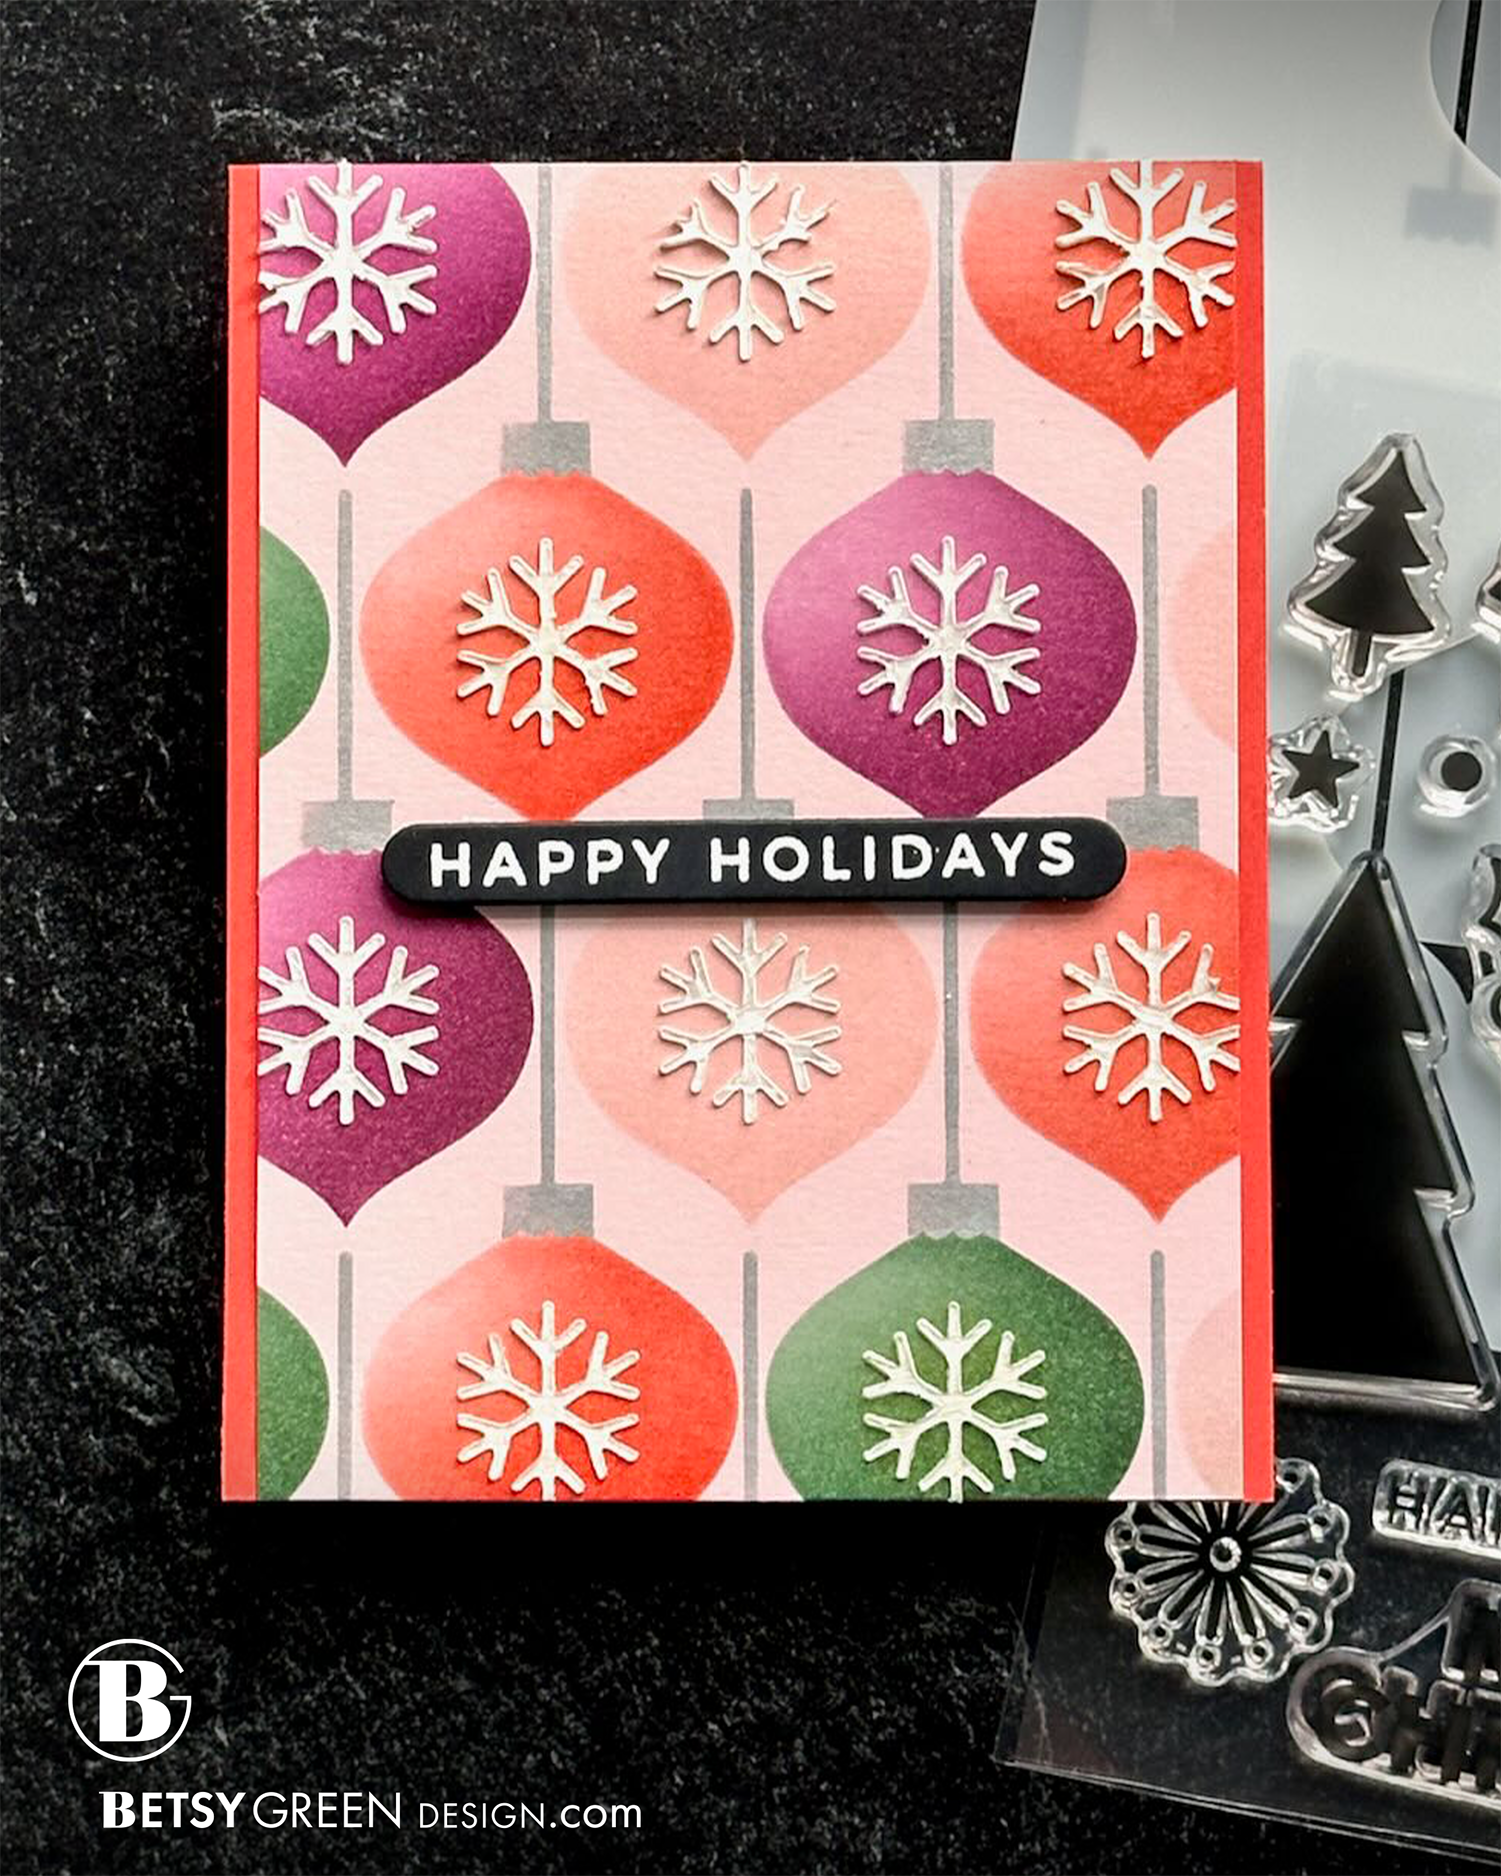
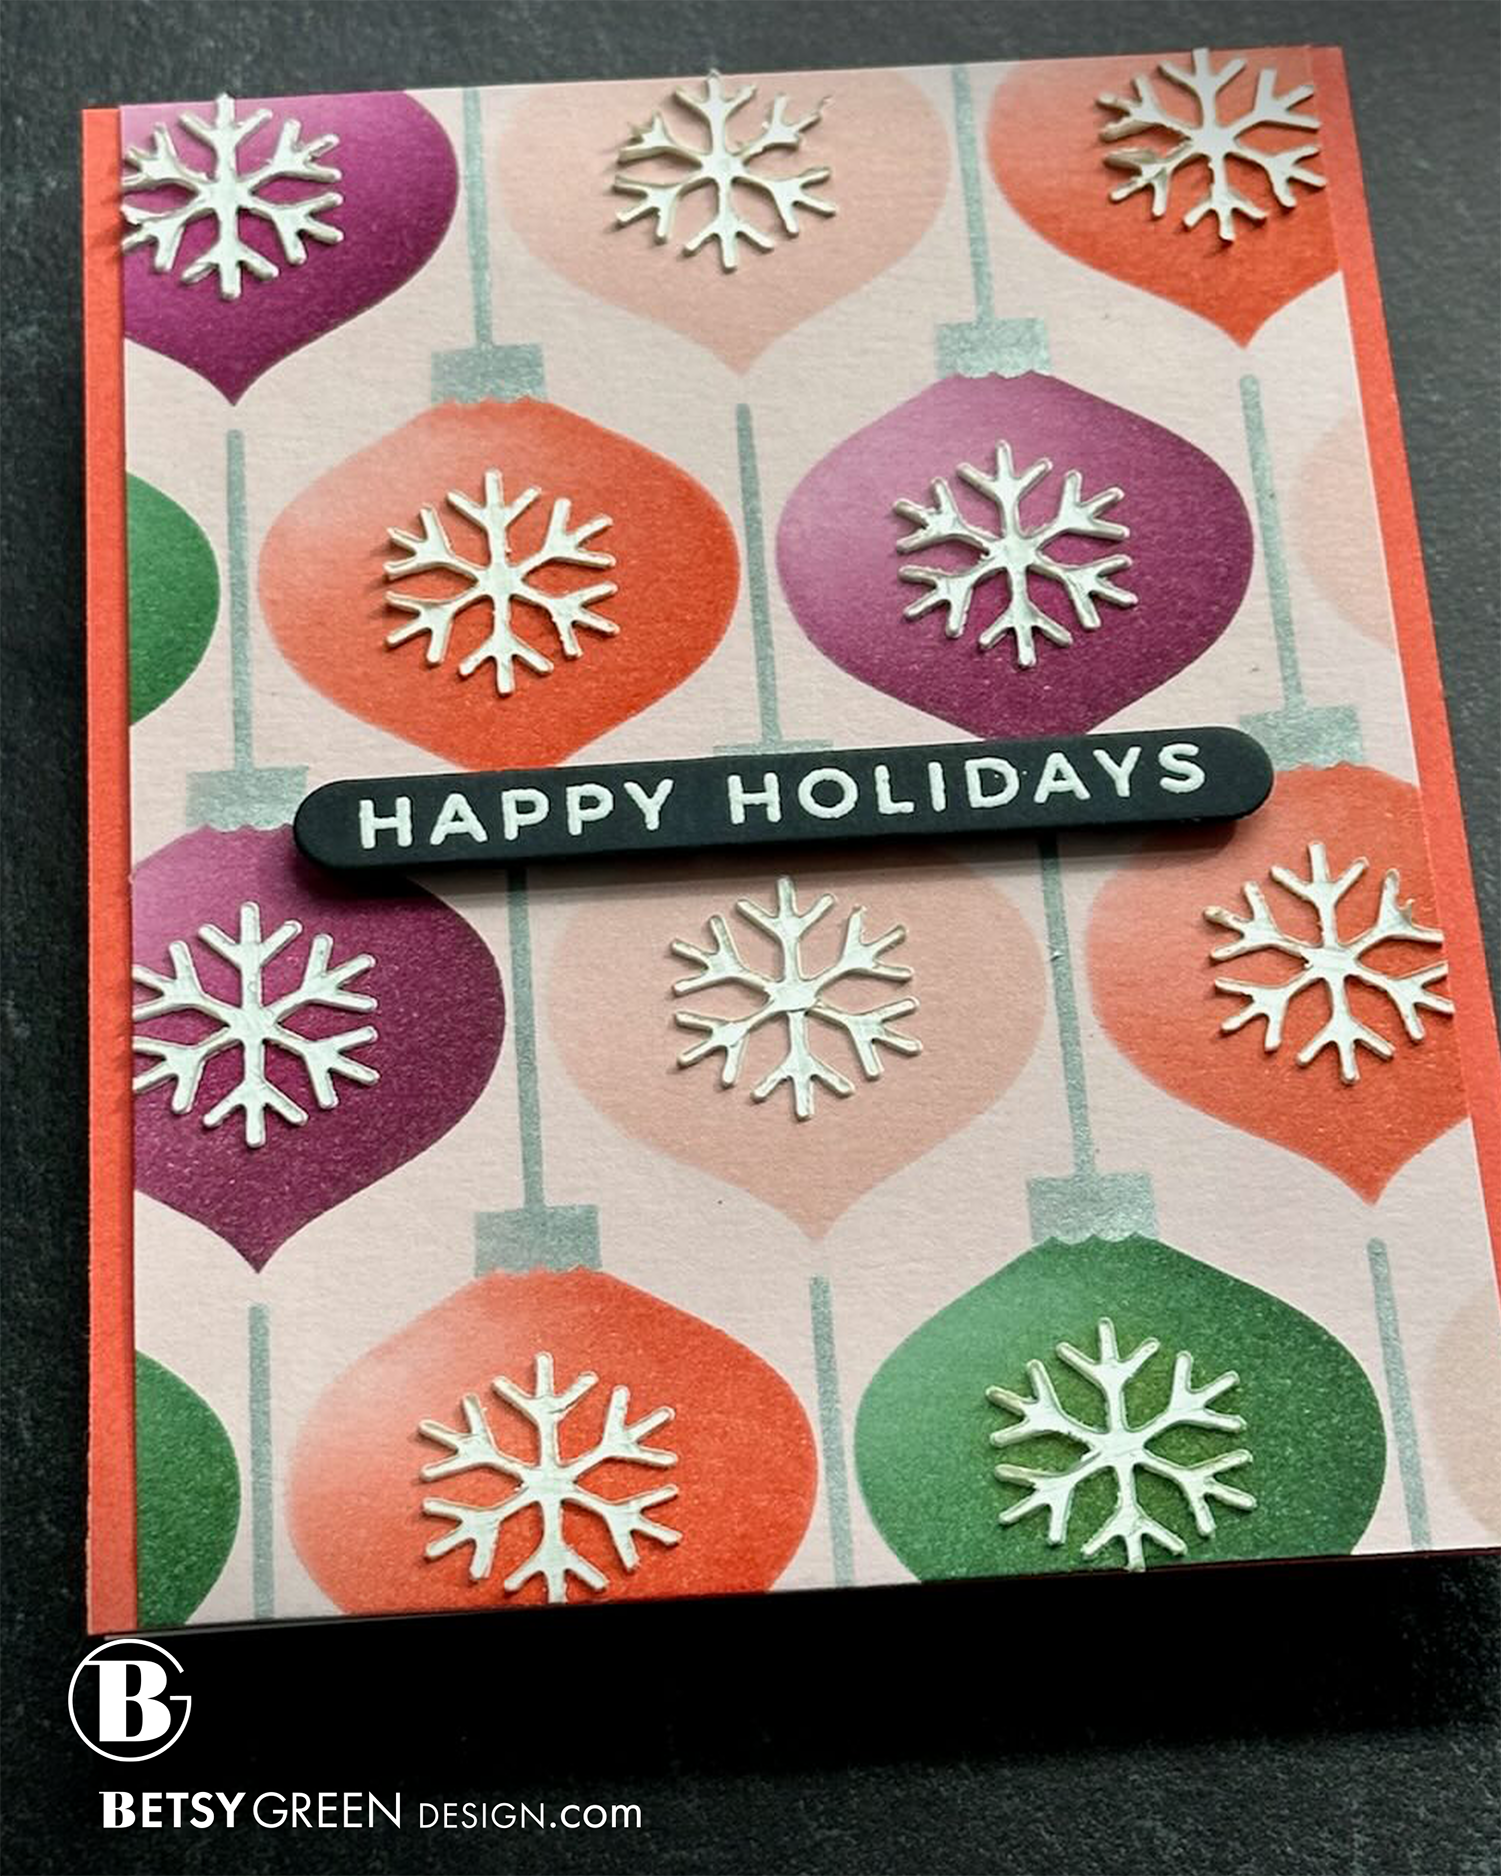
This time, I used the full stencil area, but placed on top of two different colored card panels. (One Ballet Slipper for this card, one white for card 3.) I stenciled both panels with the same four colors for the ornament pattern, and then separated them for the next steps.
For this one, I ink blended the ornament hanger layer with silver metallic ink, and then used the same White Hero Paste for the snowflakes. (Always do the paste layer last if you can, because the thickness will mean that any following stencils won’t lay as flat and the lines won’t be as clean.)
I wanted a bit of a op of Pimento framing, but instead of a full frame mat I just trimmed the two sides a bit to see it on the edges. (Don’t worry - I also used a rectangle die to cut most of the middle out of the Pimento panel so I wouldn’t waste all of that wonderful color and can use it on other projects.)
The crisp black and white greeting (white embossed on black cardstock) adds more dimension and a pop of great contrast to the card.
Colors:
cardstock: Concord & 9th Ballet Slipper, Pimento, Black.
ink: Concord & 9th Plumberry, Ballet Slipper, Pimento, Evergreen. Honey Bee Stamps Metallic Silver.

Techniques:
This card is built on the white panel stenciled in the card 2 process. On top of those 4 colors of ornaments, I used the Gradual Dots Stencil to lay on top of those and add white pigment ink to add a more subtle pattern to the card, as a variation from using the stenciled snowflakes again.
Once all that ink blending was complete, I used Slippery When Wet Lunar Paste on the ornament hanger stencil so that has the texture and shine from the paste.
The sentiment I chose fits perfectly in one of the ornaments! (I’m sure she designed it that way intentionally.)
Colors:
cardstock: White.
ink: Concord & 9th Plumberry, Ballet Slipper, Pimento, Evergreen. White pigment, Black.

Thank you for visiting! I hope you get some time to create something soon.
Links are below if you’re interested in any of the products I used.
*Affiliate links do not cost you any more when you shop, but it is beneficial to creators when you use them, so thanks in advance!